“Fill holes” tools
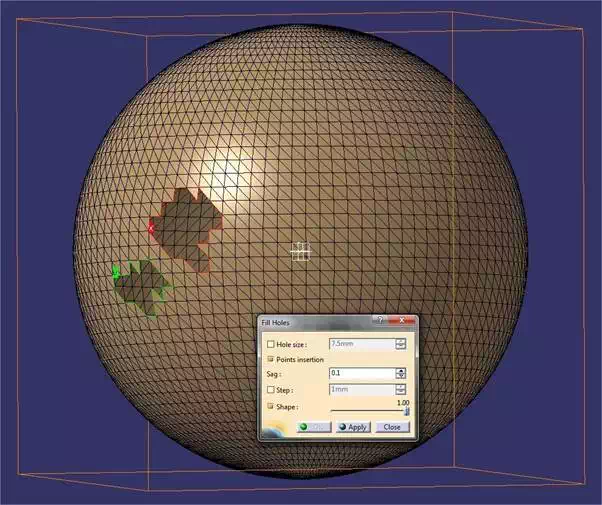
“Fill holes” is quite an efficient tool, offering many settings that can solve most cases of non-watertight meshes. To do this, click the icon located in the sidebar, the holes are then detected and a window opens with several options:
· The “hole size” allows you to select only the holes whose size is less than the value you have entered.
· The “points insertion” to select the arrow and / or the pitch of the mesh that will be generated for filling the hole. Again, the higher this value, the higher the precision of the mesh.
· Finally, the “shape” is useful for filling unflat surfaces. Do not hesitate to move the cursor position up for good continuity in the reconstruction.
Before validating and generating the filling surface, select or deselect with a single click, holes that will be affected by the repair. Green holes will be repaired, red ones will be ignored.
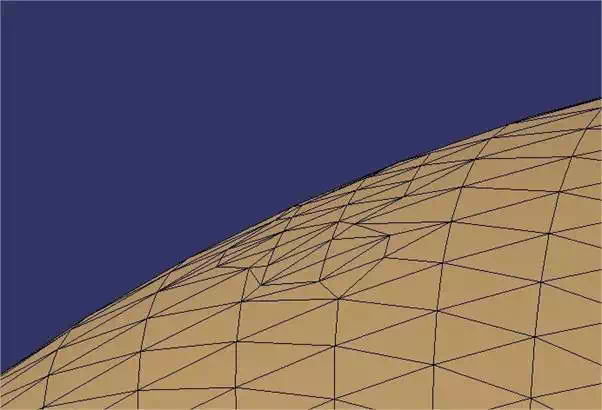
Then check the result of the reconstruction by performing a “zoom in” on the area to ensure the continuity of the surface generated with the initial surface is good. If necessary, repeat the operation by reducing the arrow and / or the not.
« Smooth » tool
This tool, which is represented by an iron in the toolbar is very easy to use. Just select some or all of your mesh, and each time you click on “apply” a smoothing operation will be performed. The more you repeat the operation, the smoother it becomes. After a number of operations, the algorithm plateaus and becomes less effective.
Thickness
« Mesh offset » tool
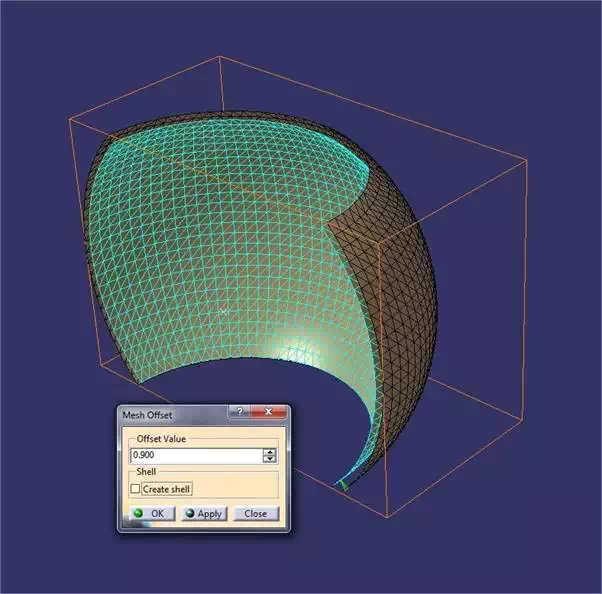
If you forget to generate thickness of one or more surfaces in your model in the GSD workbench, it is always possible, even after your meshed model has been created, to generate thickness.
To do this, use the “mesh offset” tool, enter the value of the thickness, and remember to check the option “create the shell” to generate a closed body.
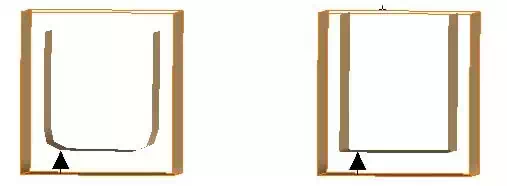
« Rough offset » tool
This tool allows you to precisely control the shape and quality of the shell you will generate. Click on the icon “offset distance”. A black arrow represents the length of your shift and its direction.

The setting on the granularity directly affects the quality of the mesh of the generated shell. The higher is the granularity, the lower the accuracy (left image). Conversely, a high granularity will reduce the size of your exported file (right image).
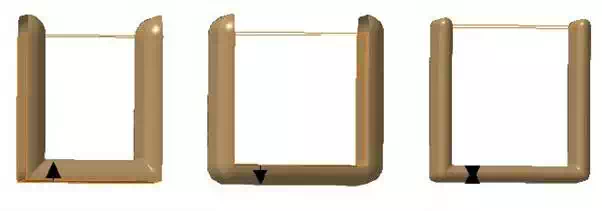
Finally, the 3 direction icons allow you to control the shift.
Normal orientation
As mentioned earlier in the tutorial, the orientation is especially important for the volume to be valid for 3D printing because it helps to determine the inside and outside of the shape.
If your body is a solid body in CATIA, you will not have any problem. CATIA allows only the creation of “consistent” solids.
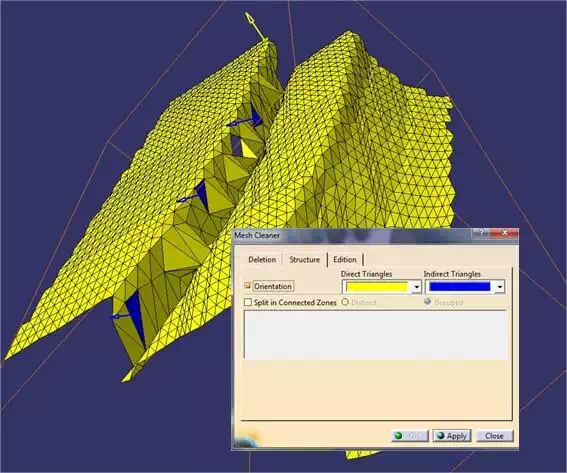
If your body is a surface body, the orientation of the mesh is automatically managed by CATIA during creation. You can see it in the “mesh cleaning” tool “structure” tab and then selecting “orientation”. You can then reverse the orientation of certain faces if necessary by clicking the corresponding arrows. In the unlikely event CATIA generates errors during export (complex files), the Sculpteo auto repair tools will be able to repair it automatically because the bodies generated by CATIA are easily adjustable.

Triangle orientation
CATIA operates on a principle of NURBS, so the generation of triangles occurs only once the mesh is generated, or when exporting. In both cases, the orientation of the triangles is uniform, and there are usually no problems.
Nevertheless, it is possible to use the “mesh cleaning” tool to check that everything is in order. Go to the “structure” tab, check “orientation” and see if blue areas appear on your mesh. If so, click on each of the arrows on the inverted triangles (blue), which then become yellow and click “apply”. The affected triangles will be automatically flipped.