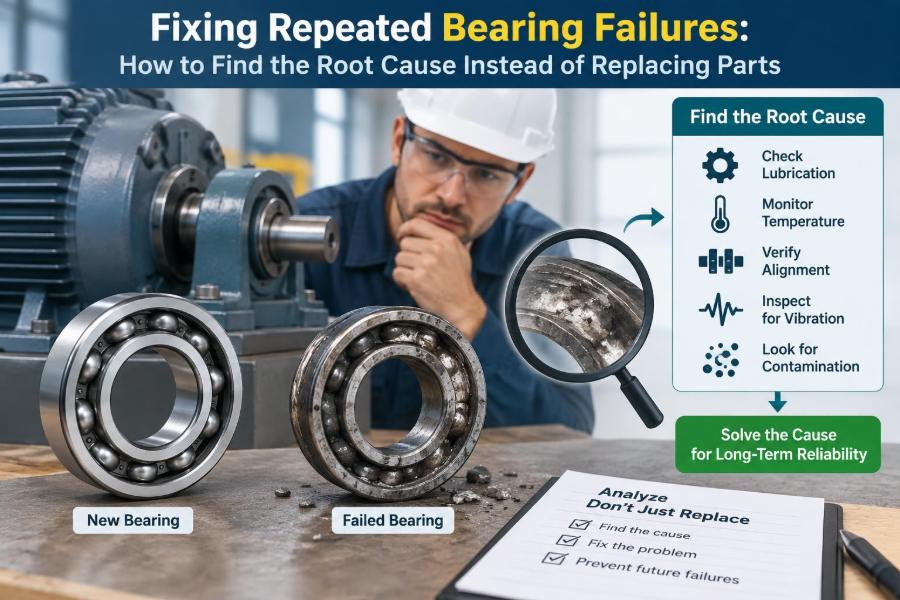

A conveyor bearing fails on the night shift. The maintenance team installs a new unit, the machine returns to service, and everyone moves on. A few weeks later, the replacement fails in nearly the same location.
That pattern is frustrating, costly, and more common than it should be. The bearing may be the part that broke, but it is not necessarily the part that created the damaging conditions.
Repeated bearing failures can lead to lost production, emergency work, collateral shaft and housing damage, and understandable pressure to choose a “stronger” bearing. Yet changing the part without changing the mechanism often only resets the clock.
A better approach treats every failed bearing as evidence. Its noise, temperature history, damage pattern, lubricant condition, fit, and operating environment can point toward the real cause—if the evidence is preserved and interpreted before the machine is rebuilt.
🔁 When a Bearing Failure Is Really a System Failure
A rolling-element bearing works within a system that includes a shaft, housing, seals, lubricant, load path, drive arrangement, installation method, and operating practices. A fault in any one of these areas can overload or damage the bearing.
For this reason, a bearing that fails repeatedly is often reporting a system-level problem. Replacing it with the same designation may be correct only after confirming that the original bearing was defective, incorrectly selected, or damaged by an isolated event.
The failed component identifies where the symptom appeared, not automatically where the cause began.
🎯 Define the Failure Before Searching for Its Cause
“The bearing failed” is too broad for useful troubleshooting. Define what actually happened: Did it become noisy, run hot, seize, develop excessive radial movement, shed grease, vibrate, or damage the shaft?
Record when the symptom appeared relative to startup, speed changes, product changes, washdown, lubrication, or repair work. A bearing that overheats within minutes of installation suggests different causes from one that becomes noisy after months of service.
- Which bearing position failed?
- What was the observed symptom?
- How long did it run after installation?
- What changed before the failure?
- Did the machine still meet its normal load and speed conditions?
🧾 Build a Failure History, Not Just a Work Order
Maintenance records are often scattered: a work order says “replace bearing,” an operator log notes vibration, and a storeroom record shows a different lubricant was issued. Bring these details together into one timeline.
Include bearing make and designation, clearance class, seal type, lubricant, installation date, running hours, shaft and housing repairs, and observations from removal. Also note whether failures occur on one side of a machine, on one shift, or after a specific task.
Patterns matter. For example, failures occurring only after belt replacement can indicate alignment or tensioning problems rather than a bearing-quality issue.
📦 Preserve the Evidence at Removal
A common diagnostic mistake happens during removal. Cutting a bearing apart, washing it aggressively, or prying it off with improper tools can destroy marks that would have revealed contamination, electrical damage, or mounting distress.
Photograph the assembly before disassembly. Mark the bearing orientation, shaft direction, and load zone if known. Keep the lubricant, seals, spacers, locknuts, and damaged adjacent parts with the bearing whenever practical.
If removal requires force, document where the force was applied. A puller load transmitted through rolling elements can create new dents and confuse the later examination.
🔍 Read the Damage Pattern Like a Diagnostic Record
Rolling contacts leave characteristic traces because forces are transmitted through small contact areas. Damage is not always conclusive by itself, but it becomes powerful when combined with operating history and measurements.
| Observed condition | Possible mechanism to investigate |
|---|---|
| Indented raceway marks at regular rolling-element spacing | Shock loading, incorrect mounting force, or vibration while stationary |
| Fine gray or frosted track damage | Lubrication film failure, contamination, or surface fatigue progression |
| Rust-colored staining or etched surfaces | Water ingress, condensation, or corrosive contamination |
| Fluting or washboard-like raceway pattern | Electrical current passage through the bearing |
| Localized wear at one raceway edge | Misalignment, shaft deflection, or incorrect fit and preload |
Use these patterns as hypotheses, not verdicts. Several mechanisms can produce similar-looking distress, especially after severe damage has progressed.
⚖️ Separate the Immediate Failure From the Root Cause
An immediate mechanism may be “lubricant film collapsed,” while the root cause is an automatic lubricator that stopped dispensing, a blocked grease passage, excessive heat, or the wrong grease specification. Stopping at the immediate mechanism leads to incomplete corrective action.
A useful chain asks: What damage occurred? What condition allowed it? Why did that condition exist? What control failed to prevent or detect it?
This distinction prevents vague conclusions such as “bearing wore out.” Wear is an outcome. Root-cause analysis must identify the loading, contamination, installation, or operating condition that produced it.
🧭 Start With the Actual Load Path
Bearings do not experience load only from the machine’s rated output. Belt tension, chain pull, gear mesh forces, couplings, overhung rotors, gravity, process material, and thermal movement all contribute.
Sketch the shaft and mark each force direction. Then identify which bearing carries radial load, axial thrust, or both. On a simple belt-driven shaft, overtightening the belt can sharply raise radial bearing load even when the motor power has not changed.
Do not assume two bearings share load equally. Housing geometry, fits, alignment, and shaft stiffness can make one bearing carry far more than its expected share.
📏 Check Whether the Bearing Was Properly Selected
Correct selection involves more than matching bore diameter and outside diameter. The bearing type must suit radial and axial loads, speed, expected misalignment, available space, lubrication method, temperature, contamination exposure, and required life.
A deep-groove ball bearing may tolerate moderate combined load, but a heavily loaded gearbox output may require a different arrangement. Likewise, a bearing selected for a clean, enclosed electric motor may not survive a wet conveyor environment without appropriate seals and lubrication provisions.
Selection calculations should use realistic loads and duty cycles. Where consequences are significant, involve the machine designer or bearing manufacturer rather than relying solely on catalog substitution.
📐 Misalignment: Small Angles, Large Consequences
Misalignment occurs when shaft and housing axes are not collinear, or when the shaft bends enough in service to create an angular mismatch. It concentrates contact near raceway edges rather than distributing it across the intended track.
Rigid bearing arrangements are particularly sensitive. Flexible bearings can accommodate some misalignment, but their capability is not permission to ignore bent shafts, distorted housings, soft foundations, or poor assembly.
Check alignment under realistic conditions when possible. A machine may align cold but shift after thermal growth, pipe strain, belt tension, or frame movement.
🪛 Installation Damage Can Begin on Day One
Mounting force must be applied to the ring with the interference fit. Pressing a bearing onto a shaft by pushing on the outer ring forces load through the rolling elements and can create permanent indentations before startup.
Common installation risks include hammering directly on rings, using damaged sleeves, heating a bearing beyond the supplier’s recommended practice, mixing up matched components, and failing to seat the bearing against its shoulder.
Use clean, suitable tools: a press or induction heater where appropriate, correctly sized mounting sleeves, and calibrated methods for locknut tightening. Installation is a precision task, not merely an assembly step.
🔩 Fits, Creep, and the Importance of Ring Support
An interference fit prevents a bearing ring from creeping—slowly slipping relative to its shaft or housing under load. Creep can polish or fret the mating surface, generate debris and heat, and eventually loosen the fit further.
The ring experiencing a rotating load usually needs an interference fit. However, fit choice also depends on load magnitude, ring type, temperature, housing material, and whether controlled axial movement is required.
Inspect for shiny bands, reddish-brown fretting debris, worn seats, and loss of dimensional tolerance. Installing a new bearing on a damaged shaft or oval housing often guarantees another short service life.
🧱 Measure the Shaft and Housing Rather Than Guessing
Visual inspection cannot reliably confirm roundness, taper, shoulder geometry, or fit. Use suitable gauges to measure shaft diameter at multiple positions and angles, housing bore condition, shoulder runout, and seating surfaces.
Check whether a shaft has a burr, dent, corrosion pit, keyway distortion, or raised material from prior removal. A housing can become out of round from over-tightened mounting bolts, cracked supports, weld distortion, or a damaged cartridge.
Compare measurements with the applicable drawing, bearing supplier guidance, or engineering tolerances. If those references are unavailable, do not invent acceptance limits; obtain a qualified dimensional assessment.
🧈 Lubrication Is About Film Formation, Not Just Adding Grease
Lubricant separates rolling surfaces with a thin film. When the film is too thin, surface roughness contacts directly, producing friction, heat, and progressive damage. The needed film depends on viscosity, speed, temperature, load, and bearing geometry.
Grease is not simply oil in a container. It consists of base oil, thickener, and additives. During operation, the base oil does much of the lubricating work, while the thickener helps retain it in place.
Choosing grease by color or convenience is unreliable. Match the lubricant to speed, temperature, load, compatibility requirements, and the equipment manufacturer’s recommendations.
🧪 Too Much Grease Can Be as Harmful as Too Little
Overgreasing causes churning. The rolling elements push through excess grease, generating heat that can soften the grease, separate oil from thickener, and force lubricant past seals.
Undergreasing, by contrast, leaves insufficient replenishment and allows contaminants or moisture to occupy the available space. The correct amount and interval depend on bearing size, speed, orientation, seal design, environment, and relubrication path.
Watch for a temperature rise immediately after greasing. A brief, controlled change may occur, but sustained abnormal heat requires investigation rather than another grease shot.
🧬 Grease Compatibility Deserves Attention
Mixing greases can alter consistency, oil separation, and temperature behavior because thickeners and additive systems do not always interact predictably. Compatibility cannot be assumed just because two products have a similar appearance or are both labeled multipurpose.
Before changing products, identify the existing grease and consult supplier compatibility information. Where uncertainty remains, remove old grease as thoroughly as the assembly allows and establish a documented conversion procedure.
A grease change may solve a problem, but it can also introduce one. Treat it as an engineering change, not a casual substitution.
🌫️ Contamination Often Enters Through the Smallest Gap
Dust, metal fines, fibers, process material, and water can disrupt the lubricant film and indent rolling surfaces. Once particles circulate, they create more debris and accelerate wear.
The bearing itself may have good seals, but contamination can still enter through damaged shaft sleeves, incorrect seal orientation, pressure-washer spray, a blocked drain, poor breather placement, or careless relubrication. A grease gun can introduce dirt if its coupler and fitting are not kept clean.
Examine where contamination originates and how it travels. Better sealing, guards, breathers, purge arrangements, or cleaning practices may be more effective than changing bearing brand.
💧 Water Damage Does Not Always Look Dramatic
Water can cause corrosion, reduce lubricant effectiveness, and promote hydrogen-related surface damage in severe cases. It may arrive as washdown, steam, condensation during shutdown, leaking seals, or humid air cycling through a poorly protected housing.
Intermittent exposure is especially deceptive because the bearing may look dry at inspection. Rust staining, emulsified grease, pitting, and repeated failures after cleaning events are useful clues.
For wet service, review the entire protection strategy: seal arrangement, drain paths, housing orientation, washdown direction, lubricant choice, and whether relubrication is intended to purge contaminants.
⚡ Electrical Damage Requires an Electrical Fix
Stray current can pass through a bearing and create microscopic arcs at rolling contacts. Over time, this may produce fluting, darkened lubricant, and a distinctive high-frequency vibration or noise.
Variable-frequency drives, grounding problems, welding practices, and certain motor arrangements can contribute, but diagnosis should be based on evidence rather than assumption. Similar-looking surface damage can have other causes.
Possible controls include proper grounding and bonding, shaft grounding devices, insulated bearing arrangements, or electrical isolation designed for the equipment. Replacing the bearing alone does not remove the current path.
🌡️ Temperature Is a Symptom With Many Meanings
High bearing temperature can result from overgreasing, excessive preload, poor fit, insufficient internal clearance, misalignment, high load, lubricant viscosity problems, seal drag, or nearby process heat. It is a valuable warning, but not a diagnosis by itself.
Trend temperature against speed, ambient conditions, load, and recent lubrication. A single handheld reading can be misleading if the measurement location, emissivity setting, or machine operating state changes.
Compare similar bearing positions when their duties are genuinely comparable. The more useful question is often “what changed?” rather than “is this number high?”
📳 Use Vibration Data as a Clue, Not a Verdict
Vibration monitoring can reveal increasing roughness, imbalance, looseness, misalignment, gear issues, and bearing defect frequencies. It is especially useful when trends are collected consistently over time.
However, a spectral peak associated with a bearing does not prove the bearing alone is at fault. A loose housing, damaged coupling, or structural resonance may excite the same system and shorten bearing life.
Combine vibration with temperature, ultrasound, lubrication condition, process observations, and physical inspection. This cross-checking reduces the risk of replacing a bearing because its symptom was easiest to measure.
🔊 Listen for Changes, but Avoid “Sound-Based” Diagnosis
Ultrasound tools and operator observations can detect changes in friction, impacts, or lubrication state earlier than ordinary hearing in some applications. They are useful for comparison and trend monitoring.
A noisy bearing can also transmit sound from gears, belts, pumps, or resonance in a guard. Recording the operating condition and sensor location makes observations more repeatable.
Use listening as an early warning system. Confirm the mechanism through inspection and measurement before declaring a root cause.
🏗️ Foundation, Soft Foot, and Structural Movement Matter
A machine mounted on an uneven base can distort as bolts are tightened. This condition, often called soft foot in motor installations, can alter alignment and transmit unwanted forces through couplings and bearings.
Frames may also move under process loads, thermal expansion, vibration, or deteriorated supports. A perfectly aligned unloaded machine can become misaligned once a hopper fills or a belt reaches operating tension.
Inspect baseplates, fasteners, shims, grout, supports, and mounting surfaces. Correcting structural instability may be less visible than replacing a bearing, but it addresses the force causing repeated damage.
🔗 Couplings, Belts, and Chains Can Quietly Overload Bearings
Misaligned couplings impose radial, axial, and bending loads. Belts installed too tight increase radial load, while chain drives can introduce pulsating forces and sensitivity to sprocket alignment.
Check the whole drive train after repairs. A replacement motor with a different shaft position, a changed pulley diameter, or a coupling hub that is not fully seated can alter the bearing load substantially.
In a hypothetical fan drive, repeatedly failing outboard bearings might be blamed on dust. Measurement could instead reveal excessive belt tension used to stop slipping caused by a worn pulley. The durable repair would address the pulley and tensioning method, not merely fit sealed bearings.
↔️ Axial Location and Thermal Expansion Need a Plan
Many shafts expand as they warm. A bearing arrangement normally needs one locating position to control axial shaft movement and one non-locating position to permit thermal expansion.
If both bearing positions unintentionally lock the shaft axially, thermal growth can generate damaging preload. Conversely, excessive axial freedom can allow components such as gears or impellers to move out of position.
Review shoulders, locknuts, end covers, adapter sleeves, housing fits, and bearing types as an arrangement. The question is not simply whether each bearing is tight, but whether the shaft can expand in the intended direction.
🧹 Maintenance Practices Can Create Repeat Failures
Well-intended routines sometimes damage bearings: adding grease on a calendar without considering condition, washing machines while hot, reusing contaminated lubricant containers, or installing parts from unprotected storage.
Standardize critical tasks with clear instructions, correct tools, lubricant identification, torque requirements, and inspection points. Training should explain the reason behind each step, because technicians are more likely to recognize abnormal conditions when they understand the mechanism.
Good procedures should still allow professional judgment. A route sheet that says “add two pumps” should not override evidence that the bearing is already overheating from excess grease.
🧠 Use a Structured Root-Cause Method
A practical investigation can follow a disciplined sequence:
- Make the equipment safe and document the symptom.
- Preserve the failed parts, lubricant, and installation orientation.
- Review failure history and operating changes.
- Inspect damage patterns and surrounding components.
- Measure fits, alignment, runout, and drive conditions.
- Test the leading hypotheses against all available evidence.
- Correct the physical cause and the process weakness that allowed it.
- Verify performance through planned follow-up monitoring.
Methods such as “five whys” can help, but they should not replace technical evidence. Asking why repeatedly is useful only when each answer is supported by observation, data, or sound engineering reasoning.
🛠️ Match the Corrective Action to the Mechanism
A corrective action should alter the condition that caused damage. If contamination caused abrasive wear, improve exclusion and cleaning control. If a loose fit caused fretting, restore the shaft or housing dimensions and apply the specified fit.
Some actions address symptoms only. More frequent replacement, a larger grease quantity, or a bearing with a higher load rating may temporarily extend runtime while allowing the original cause to continue.
That does not mean upgrades are never appropriate. A different bearing, seal, housing, or lubrication arrangement can be the right solution when analysis shows that the original design does not match actual service conditions.
✅ Verify That the Fix Worked
Root-cause work is incomplete when the machine simply returns to operation. Establish what will demonstrate success: stable temperature, improved vibration trend, correct lubricant condition, absence of seal leakage, or completion of a meaningful operating period without recurrence.
Inspect the first hours and days after a major correction. Confirm that fasteners remain secure, grease reaches the intended cavity, the housing temperature stabilizes, and alignment has not changed under load.
Document the result. A concise case record helps future teams avoid repeating the same diagnosis and preserves valuable equipment-specific knowledge.
🚫 Common Shortcuts That Keep the Failure Cycle Going
- Replacing the same bearing repeatedly: fast restoration, but no learning if evidence is discarded.
- Adding more grease whenever noise appears: may worsen heat and churning.
- Assuming a premium bearing solves poor conditions: quality cannot compensate for misalignment, current, or contamination.
- Judging fits by feel: damaged seats and out-of-round bores require measurement.
- Changing several variables at once: makes it difficult to know which correction mattered.
Speed matters during downtime, but a short, focused investigation can prevent a much longer sequence of repeat outages.
🧩 The Core Principle: Fix the Conditions, Not Just the Component
Repeated bearing failures become manageable when the investigation connects physical evidence to machine conditions. The bearing surface tells part of the story; load paths, lubricant, fits, alignment, environment, electrical conditions, and maintenance history tell the rest.
The goal is not to assign blame to a part, supplier, or technician. It is to identify the mechanism accurately enough that the corrective action removes it and the operating system can keep it from returning.
A bearing replacement restores function; root-cause correction restores reliability.
When the same bearing fails again, pause before fitting another one: preserve the evidence, test the system around it, and change the condition that is doing the damage. ⚙️🔍🛠️