Vibration Analysis

vibration-analysis-level-1-1.jpg

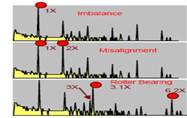
The vibration signature of a machine is the characteristic pattern of vibration it generates while it is in operation. It has been shown many times over that the vibration of an operating machine provides far more information about the inner workings of that machine than any other type of nondestructive test. A bearing that has a small developing fault will cause a tell-tale change in the machine’s vibration, as will a weight imbalance condition, a shaft or coupling misalignment, or any of a myriad of other faults.

With virtually all building owners and operators seeking reductions in plant maintenance manpower, as well as greater efficiency of all maintenance practices, the value of vibration analysis has become more obvious in recent years. Vibration analysis provides a thorough evaluation of all moving parts of one’s plant equipment and machinery, can identify root causes as well as specific machine faults, and most importantly, is capable of correctly identifying those machine faults when or actually before they first appear.


Vibration analysis, properly applied, allows the detection of small developing mechanical defects long before they become a threat to the integrity of the machine, and thus provides the necessary lead time to suit the needs and schedules of the plant operators / management. In this way, plant management has control over the machines, rather than the other way around. Properly applied, vibration analysis offers the following significant benefits:

Transition from “Run to Failure” mode or preventive to Predictive Maintenance
Acceptance testing of new equipment delivery and installations
Quality assurance of major overhaul repairs
Implement Proactive maintenance practices
Avoid or minimize unnecessary calender-based maintenance
Decreased or eliminated unscheduled machine downtime
Improved maintenance management by directing resources on a need basis
Energy savings


Recommended Levels of Testing

In order to get the best results from a vibration analysis, regular equipment testing is required. When the program is first set up it will generally provide only a small set of data to evaluate. In the worst case, there may be only one set of reference data from only one individual piece of equipment. At best, a number of examples of the same given machine type will provide a larger sample of data for analysis and comparison. As each machine is re-tested and another cycle of data collected, the accuracy for evaluating equipment condition will improve.

Clearly, a successful vibration program is dependant upon an accurate accumulation of data over time. How often data should be collected is generally dictated by how critical your equipment is to your specific operation. Each time a reading is performed on a particular piece of equipment, the success rate of your vibration analysis program increases and the better your chances are of allowing yourself to forecast equipment problems, schedule corrective action and avoid catastrophic failure. Generally speaking, in most applications, the minimum data collecting frequency is quarterly. Semi-annual testing may be appropriate to some non-critical equipment types.

Procedures and Specifications

The following is a detailed specification of testing procedures, equipment, and reporting methods used in our vibration analysis program. It is fundamentally based upon the testing methods established by DLI Engineering, as well as our own experience. Such testing and reporting procedures have evolved over many years based upon our response to the needs and requests of our customers.


Preliminary Investigation

Prior to the actual field testing, East Coast Industries, Inc. shall conduct a walk through of the equipment location(s), and review all pieces of rotating equipment such as fans, chillers, generators, condenser water, chilled water, hot water and radiation pumps, etc. in use. Operating parameters such as previous mechanical maintenance history shall be noted.


Test Equipment and Sensors

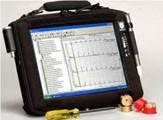
Field testing shall be performed using the DLI Watchman® DCX™ XRT which is equipped with a triaxial accelerometer. The DLI Watchman® DCX™ XRT is capable of many analytical functions including time synchronous averaging and demodulation for analysis of gears and bearings. Other analysis functions include log or linear amplitude scales, live harmonic markers, and single or multiple channel displays for both time and spectrum.


The DCX measures narrow-band frequencies as opposed to broad-band frequencies. Narrow-band analysis identifies specific machine faults where broad-band only identifies overall vibrations levels which encompass a wide range of frequencies.

Tri-Axial Measurements

To determine machine health and identify problems, vibration data from each measurement point will be taken in three directions. This is accomplished by using a triaxial accelerometer. A triaxial accelerometer has three transducers in one housing, and they are oriented in the three orthogonal directions called Axial, Radial, and Tangential. Axial is the direction parallel to the centerline of a shaft or turning axis of a rotating part. Radial is that direction toward the center of rotation of a shaft or rotor. The Tangential measurement is that measurement that is tangent or perpendicular to the radial transducer.


Machine Preparation

The most reliable data is collected when the transducer is permanently mounted to the machine surface. In any machinery monitoring program, it is extremely important that the data is collected in exactly the same manner each time a measurement is taken. This is to assure that the data is repeatable and can be trended over time. For this reason, it is not recommended that hand-held transducers be used. For that reason ECI installs a cylindrical mounting block or “pad” at each bearing point on the machine. A pad is a bronze disc with a center tapped hole and has a knoch at the edge that receives an indexing pin that is located on the accelerometer.


The direction that is sensitive along the axis of the mounting screw is channel number one. The axis in the direction of the key way is channel number two, and the axis perpendicular to this is channel number three. The “pad” is attached to the machine using an adhesive which consists of two parts to permanently assure that the data is repeatable and can be trended over time. The installation of the mounting blocks is sometimes referred to as “blocking” a machine.


A typical motor driving a pump or fan usually consists of four test points. Typically having one test point located at the motor free end. The second located at the drive end of the motor. The third test point located on the driven end of the pump or fan, and the fourth point located on the free end of the pump or fan.


Software Database Setup

Once the machine preparation is completed and all the information is collected, the information can then be programed into the DLI Watchman® DCX™ XRT software. The software used by the DLI Watchman® DCX™ XRT is called Expert Alert. This software allows you to setup a database in a hierarchy of plant, area, and machine. A plant is the physical site where the company performs normal everyday operation. Areas are used to group machines together in a specific region of the plant. The final grouping is done by machine. This allows you to use a name or number to relate to a specific machine in an area.


To get the best results from the Expert Alert software it is important to have a good average database. The average database tells the system what the vibration levels should look like, what vibration levels are normal, and how much vibration variation to expect. There should be at least five averages to make up a good average database. There is only one average recorded per “MID”. A “MID”is a grouping of identical machines running under like conditions. A unique machine will have its own “MID”.


Testing Procedure

After the machine is blocked and the Expert Alert software is configured to the equipment to be tested, we are ready to began testing. The triaxial accelerometer is then attached to the proper test point “pad”on the machine. It is attached by lining up the indexing pin, and tightening the center screw into the center tapped hole in the “pad”.


While the machine is running, the DLI Watchman® DCX™ XRT will collect the vibration data. All data collected is then stored on the DCX’s built in hard drive in wave form spectra. This step is then repeated until all test points for a particular machine have been tested. If we are testing a machine with a “VFD”, (variable frequency drive), it is recommended that the run speed be set to the same hertz during every test. This assures repeatable test data and accurate results.


Reporting Criteria

Once all data is collected it is brought back to the office for analysis on a desktop computer. ECI employs one of the most powerful vibration software packages available on the market today. This advanced Expert Alert software is a powerful integrated system that provides fully automated fault diagnosis and repair recommendations on any type and number of machines, faster and more accurately than human experts. This system is capable of detecting several hundred machine faults which lead to degradation and failures such as bearing wear, misalignment, imbalance, pump erosion, foundation flexibility and reduces false calls from flow and other process noise and external vibration. Expert Alert software also gives you a detailed diagnoses as well as a severity level for all faults present. Severity levels are based on a combination of vibration levels and their exceedances of average plus one sigma. Other frequencies and groups of vibration peaks are addressed by a templet. Each specific mechanical fault is represented by a diagnostic templet. The expert system uses approximately three hundred and fifty different templates to determine faults, harmonics, sidebands, and elevated noise floors.


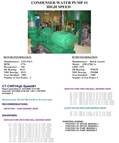
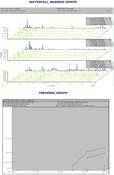
A full report is delivered to you within several days. Each report includes detailed information on the machine tested, machine history, time and date of test, running speed, faults detected and repair recommendations. In the event we foresee a severe problem that requires immediate action, we will call and fax you immediately with specific repair recommendations. Our report formats provide the information our clients want in a clear and concise text using non-technological language. The machine reports allow you to run a proactive and more efficient maintenance program. Our report includes actual spectrum graphics, specific data derived from all test locations, and a complete explanation of its importance. The final result is a professional, ready for presentation report filed with the information necessary to not only justify a repair, but to pinpoint the origin of the problem and the replacement parts required.


Clear Presentation of Results

Related Posts

Comments are closed.

© 2025 Mechanical Engineering - Theme by WPEnjoy · Powered by WordPress