During some cases, metal units with complicated orientations may become difficult securing or integrating with other metal components. Metal Studs are especially made for such applications for fixing complex metal structures or assemblies firmly over desired positions.
● Studs explained here are metal rods that are threaded at both the ends. In circumstances where metal parts or metal components become impossible to be fixed with bolts or screws, these metal studs come into play and help in fitting them securely at the desired locations. In this process, the stud is screwed through one of the metal parts and allowed to enter midway across the preceding metal part; the entire system is then secured by tightening a nut over the outer top terminating end of the stud (see fig).
● Studs are usually made up of high tensile steel, with sizes of 2 BA, ¼” BSF, 5/16″ BSF and 3/2″ BSF.
● Studs may be classified with the following main types:
● Standard Studs: These are in the form of plain rods having threads cut over their two ends.
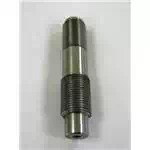
● Waisted Studs: As the figure illustrates, in this type of studs the central unthreaded section is kept clean and the diameter equal to the core of the threaded portion. This arrangement helps to keep the stud simple and lighter in weight. The two ends are appropriately threaded for the required clamping operations.
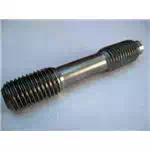
● Stepped Studs: Here, one of the threaded end sections of the stud has larger diameter than the opposite threaded portion. The larger threaded section is generally used for fixing metal parts made up of softer material thereby allowing greater area of the material to be gripped, confirming reliable fixation.
● These studs can also be employed for replacing broken studs, where normally the hole needs to be re-tapped making the hole size bigger and suitable for screwing with the broader threaded ends of stepped studs.
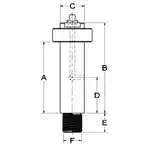
● Shouldered Studs : Referring to the fig. we find one of the threaded end collars of the stud having an integral machined shoulder terminating from the plain mid section of the stud body. The collared disc seats itself firmly over metal parts making the screwed assembly clamped more rigidly compared to other types of studs discussed above.
Tools Used for Fixing Studs across Metal Components
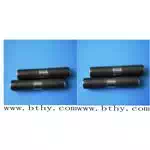
● Stud Box: A stud box is used for fitting studs with the help of spanners. They are also used in conjunction with lock nuts with spanner being held over the stud’s upper nut or with a stud inserting tool.
● Stud boxes are equipped with different ranges of thread sizes, which makes them possible to be used for fitting two differently sized studs across a single tapped hole simultaneously.
● Stud Inserting and Extracting Tool
● The image shows an exploded view of a stud inserting and extracting tool. In the assembled form the cam follower mechanism are enclosed within the body and are allowed to move freely across the slotted hole boundaries. The “end plate” is kept well pressed over the end of the unit and secured through peening.
● The stud, which needs to be inserted or removed, is passed through the end plate hole, until the stud’s central plain section is deep inside the tool’s body. The locating screw at the head of the tool is then suitably adjusted to stop the stud from entering the tool further.
● On rotating the tool, the body of the tool tends to remain in one position due to the special design of its light frictional cam follower gripping over the shank of the stud.
● The stud is tightly gripped inwards by the follower due to the force exerted by the rotating cam over it.
● The stud is then forced to rotate along with the tool with the same direction.
How to Remove Broken Studs
● Removing Broken Studs with Some Part of it Above the Metal Surface
● In certain cases, we may come across broken studs having some part projecting above the surface of the metal component on which it had been fixed. Such projected broken studs can be removed by first filing a couple of “flats” over the projected surface and then gently unscrewing it with the help of a tap wrench or a spanner.
● Removing Broken Studs “hiding” Below the Metal Surface
● If a stud is found to be broken with no part of it appearing above the metal component, may be removed with either of the following methods:
● Make a center “POP” on around the middle of the stuck stud using a punch. Drill a hole on the popped mark using a drill half the diameter of the stud. Gently hammer down a tapered drift into the hole until it’s tightly fixed with the stud. Unscrew the stud by rotating the drift’s upper square end with the help of a spanner. Make sure not to use hard metal drift, as we don’t want the stud to expand inside and make things more difficult.
● Alternatively, threading may be tapped into the drilled hole as described above with an “opposite” or counterclockwise rotation (hand). A bolt with similar threading may be screwed into the hole and the system may be slowly unscrewed with the help of a spanner to remove the stud.
● The above tapping method can also be applied by using an “Ezy Out” extractor tool, which is by itself a crude type of “opposite” tap but does not require an additional bolt for carrying out the above removal procedure.