
A conveyor begins to run hotter than usual. An operator hears a faint rattle near a gearbox. A pump needs a little more time to reach pressure. None of these signs necessarily stops production that day, so it is tempting to keep going.
Then a bearing seizes, a belt fails, or a coupling breaks during a busy shift. The visible repair may be straightforward, but the real cost includes lost output, rushed troubleshooting, damaged adjacent parts, and a disrupted schedule.
Machine wear cannot be eliminated. Every moving machine consumes some portion of its useful life through friction, load, heat, vibration, contamination, and fatigue. The practical goal is to control those forces so wear remains slow, predictable, and detectable.
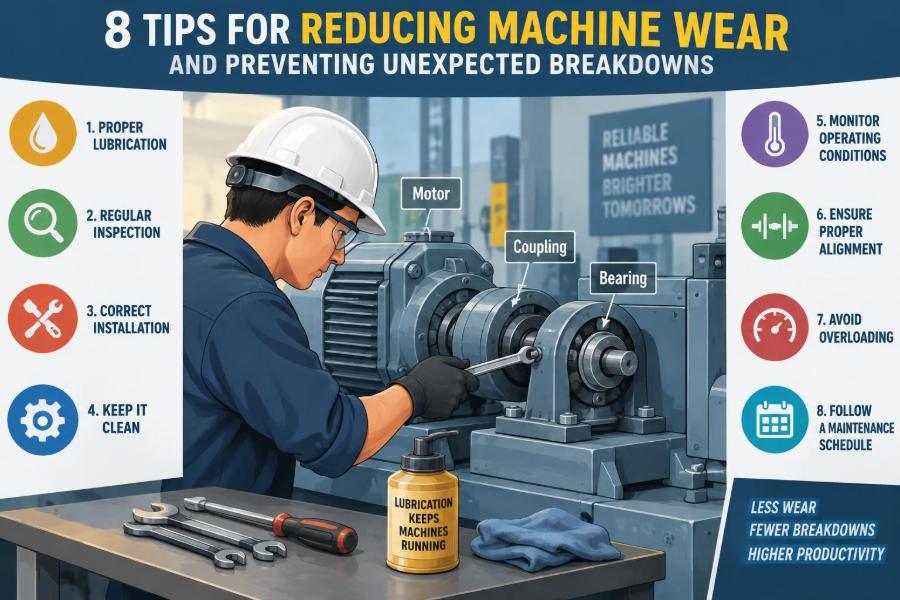
The eight tips below are not isolated maintenance chores. Together, they create a system for preventing unexpected breakdowns while helping engineers, technicians, and operators make better decisions about machine condition.
🔍 1. Understand What Wear Is Actually Telling You
Wear is the gradual loss or alteration of material at a surface. It may appear as polished tracks, scoring, pitting, looseness, cracks, increased clearance, or a change in surface finish. A worn part is not always a failed part, but it is evidence that energy and contact conditions are changing.
Different wear mechanisms demand different responses. Abrasive wear occurs when hard particles scratch a surface. Adhesive wear occurs when contacting surfaces briefly bond and tear material away. Fatigue wear develops after repeated stress cycles, while corrosive wear combines chemical attack with mechanical action.
Looking only at the damaged component can be misleading. A failed bearing, for example, may be the symptom of poor lubrication, shaft misalignment, contamination, electrical current, or an excessive belt load. Effective prevention asks why the part wore, not merely which part must be replaced.
🧭 2. Start With a Criticality-Based Maintenance Plan
Not every asset deserves the same inspection frequency or the same level of monitoring. A small fan with an available backup is different from a gearbox that stops an entire process line or creates a safety hazard if it fails.
Rank equipment by consequences rather than by age alone. Consider production impact, safety risk, environmental effect, repair lead time, spare-parts availability, and whether a temporary workaround exists.
- Critical assets: monitor closely, document trends, and plan work before condition becomes urgent.
- Important assets: use scheduled inspections and standard preventive tasks.
- Low-consequence assets: use simpler checks or run-to-failure only when failure is safe and economical.
This approach directs limited labor toward the failures that matter most. It also prevents a common mistake: spending hours over-maintaining low-risk equipment while neglecting a single point of failure.
🛢️ 3. Choose the Correct Lubricant, Not Just Any Lubricant
Lubricant separates moving surfaces, removes some heat, protects against corrosion, and carries contaminants toward filters or drain points. Its viscosity, or resistance to flow, must suit the load, speed, temperature, and component design.
A lubricant that is too thin may not maintain a protective film under load. One that is too thick can increase fluid friction, raise temperature, and make cold starts difficult. Grease selection also involves base-oil viscosity, thickener compatibility, additives, and the operating environment.
Do not assume two products are interchangeable because they share a broad label such as “gear oil” or “multipurpose grease.” Follow the machine manufacturer’s recommendation, then confirm that local temperature, moisture, washdown conditions, and duty cycle do not require a justified adjustment.
💧 4. Apply Lubricant in the Right Amount and at the Right Interval
More grease is not automatically better. Over-greasing rolling-element bearings can churn the grease, elevate temperature, damage seals, and force lubricant into unwanted areas. Under-greasing allows metal contact and can accelerate surface fatigue.
The correct interval depends on bearing size, speed, load, temperature, orientation, seal condition, and contamination exposure. A slow, lightly loaded bearing may need attention far less often than a high-speed bearing beside a dusty process.
Where practical, use a measured delivery method rather than a vague instruction such as “give it a few pumps.” Record the lubricant type, quantity, date, and location. These simple records make errors easier to find when temperatures or vibration change later.
🧼 5. Keep Dirt, Water, and Process Material Out
Contamination is one of the fastest ways to shorten component life. Dust acts like a fine abrasive, water can reduce lubricant performance and promote corrosion, and process material can block cooling passages or interfere with moving parts.
Contamination control begins before lubricant enters the machine. Store drums and containers sealed, clean fill ports before opening them, use dedicated transfer equipment, and avoid leaving breathers or inspection covers exposed during maintenance.
Good sealing is equally important. Inspect shaft seals, gaskets, breathers, filter housings, and guard interfaces. If a seal repeatedly leaks, replacing it without correcting shaft finish, runout, pressure, alignment, or installation damage may only postpone the next leak.
🧪 6. Use Oil Analysis as a Condition Clue
Oil analysis can reveal information that is difficult to see from the outside. Depending on the test, it may indicate viscosity change, moisture, particle concentration, oxidation, additive depletion, or wear metals.
The value lies in trends and context. A single sample can be influenced by sampling method or a recent oil change. Repeated samples taken from the same live zone, at similar operating conditions, are much more useful for identifying a developing issue.
Oil analysis does not replace physical inspection or vibration checks. Instead, it helps narrow questions: Is dirt entering the gearbox? Is the lubricant overheating? Is there increasing metal debris that warrants an inspection?
📏 7. Maintain Shaft and Coupling Alignment
Alignment means positioning connected shafts so their rotation occurs with minimal angular and offset error. Flexible couplings tolerate some misalignment, but they do not make excessive misalignment harmless.
Misalignment places extra force on bearings, seals, couplings, and shafts. It can cause vibration, heat, coupling-element wear, and repeated seal failure. Thermal growth matters too: a machine aligned while cold may move into a different position at operating temperature.
Use the method appropriate to the equipment and required precision. Straightedges and feeler gauges can provide a rough check on simple drives, while dial indicators or laser systems offer better measurement for critical rotating equipment. Correct soft foot first; a machine frame that rocks on its mounting points cannot be aligned reliably.
🎯 8. Set Belt, Chain, and Drive Tension Correctly
Drive tension is a compromise. A belt that is too loose can slip, generate heat, and wear rapidly. A belt that is too tight increases radial load on bearings and shafts. Chain drives also need correct tension and alignment to avoid impact loading and tooth wear.
Check pulley and sprocket condition at the same time. Worn grooves, damaged teeth, incorrect sheave alignment, and mismatched belt sets can defeat an otherwise correct tension setting.
For a multi-belt drive, replace belts as a matched set when the manufacturer recommends it. Mixing a new belt with significantly stretched older belts can distribute load unevenly and cause the new component to carry more than its intended share.
📳 9. Treat Vibration as a Useful Warning Signal
All rotating machinery vibrates to some degree. The concern is a change in vibration level, frequency pattern, or direction. Those changes can indicate imbalance, misalignment, looseness, bearing damage, gear mesh problems, resonance, or hydraulic pulsation.
Handheld checks and operator observations can identify obvious changes, but instrumented vibration monitoring provides more diagnostic detail. The goal is not simply to collect readings; it is to compare them with a baseline and investigate meaningful trends.
Measurements need operating context. A pump running at a different speed, flow rate, or temperature may show a different vibration signature without having the same underlying defect. Document speed, load, and process state with the reading whenever possible.
🌡️ 10. Watch Temperature Changes Before They Become Damage
Heat is often both a symptom and an accelerator of wear. High friction, inadequate lubrication, excessive load, electrical resistance, blocked cooling, and poor alignment can all raise component temperature.
Infrared tools and fixed temperature sensors can be useful screening methods, especially when readings are compared at consistent load and ambient conditions. A surface temperature alone does not diagnose a fault, but a gradual increase at one bearing housing or electrical connection deserves attention.
Be careful with interpretation. Shiny, reflective surfaces can give misleading infrared readings, and a hot housing may not match the temperature at the internal contact point. Use temperature data with visual checks, lubrication records, and other condition indicators.
⚖️ 11. Prevent Overload and Repeated Shock Loading
Components are designed for defined load ranges, not unlimited force. Overloading bends shafts, raises bearing loads, overheats motors, stresses fasteners, and reduces fatigue life. Repeated short overloads can be as damaging as a single dramatic event.
Shock loading is especially harmful because force rises sharply when motion changes suddenly. Examples include jammed conveyors, abrupt starts with heavy inertia, dropped loads, and valves closing too quickly in fluid systems.
Review operating practices as well as equipment ratings. Soft starts, properly sized torque limiters, controlled acceleration, relief devices, and jam detection may reduce mechanical stress. These features must be selected and set for the actual application, not treated as universal fixes.
🔩 12. Control Fastener Looseness and Joint Movement
Loose fasteners allow parts to move relative to one another. That movement can enlarge holes, fret contact surfaces, change alignment, crack brackets, and create vibration that affects nearby components.
Use the specified tightening method and sequence, especially on machine bases, bearing housings, structural connections, and pressure-containing joints. Torque is often used as a practical proxy for bolt preload, but friction strongly affects the relationship, so clean threads and correct lubrication conditions matter.
Where a joint repeatedly loosens, do not rely only on more tightening compound. Investigate vibration, joint stiffness, damaged threads, incorrect fastener length, thermal cycling, and whether the clamped parts are actually seating correctly.
🧱 13. Check Foundations, Mounts, and Soft Foot
A machine can be internally sound yet perform poorly if its support structure is unstable. Cracked grout, loose anchor bolts, deteriorated isolators, warped baseplates, and inadequate frame stiffness can create movement that appears as vibration or alignment trouble.
Soft foot occurs when one or more machine feet do not sit flat on the base. Tightening the mounting bolts then distorts the machine casing or frame. This can alter alignment and load bearings even before the machine starts.
Inspect supports during planned outages. Look for fretting marks, cracked paint around anchors, broken shims, corrosion under feet, and evidence that a machine has shifted. Correcting the foundation issue may solve what otherwise looks like a recurring bearing problem.
🛡️ 14. Protect Machines From Corrosion and Environmental Attack
Humidity, chemicals, salt, washdown water, and outdoor temperature cycling can attack exposed metal and electrical connections. Corrosion reduces cross-section, roughens sliding surfaces, damages seals, and can make fasteners difficult to remove safely.
Protection may include coatings, material selection, drainage, enclosures, compatible fasteners, desiccant breathers, and regular cleaning. The best choice depends on the chemical exposure and whether moisture is intermittent, continuous, or trapped in crevices.
Cleaning must be controlled. High-pressure water aimed at seals, bearings, vents, or electrical enclosures can drive contamination inward. A clean machine is easier to inspect, but cleaning methods should not create the condition they are meant to prevent.
👂 15. Train Operators to Notice Early Changes
Operators are often closest to the equipment and may be the first people to notice a new noise, odor, leak, vibration, slower cycle, or change in product quality. Their observations are valuable condition-monitoring data when there is a clear reporting path.
Training should explain what “normal” looks and sounds like for each machine. It should also distinguish observations from diagnoses. An operator can report that a motor housing feels hotter than usual; deciding whether the cause is overload, lubrication, or electrical trouble may require further investigation.
Make reporting easy and useful. A short note with the machine ID, location, time, operating state, and symptom is far more actionable than “machine sounds bad.” Responding to reports builds trust and reduces the tendency to ignore small abnormalities.
🗓️ 16. Build Preventive Maintenance Around Failure Modes
Preventive maintenance is most effective when each task addresses a credible failure mode. Replacing a filter controls contamination. Inspecting a coupling controls wear and misalignment risk. Testing an emergency stop verifies a protective function.
A calendar alone does not make a maintenance program effective. A monthly task that says “inspect machine” is too broad unless it identifies what to inspect, what acceptable condition looks like, what tool is needed, and what action follows a finding.
Use failure history, manufacturer guidance, operating conditions, and technician feedback to refine task intervals. An interval suitable for a clean, intermittent-duty machine may be unsuitable for identical equipment running continuously in a wet or dusty area.
📈 17. Add Predictive Monitoring Where It Changes Decisions
Predictive maintenance uses measured condition to help decide when work should be done. Common tools include vibration analysis, thermography, ultrasound, motor-current analysis, oil analysis, and process performance trending.
These methods are most valuable when failure develops gradually and there is time to plan a response. They are less helpful for every failure type; a sudden electronic component failure or accidental impact may offer little warning.
Start with a specific decision in mind. For example: if bearing vibration rises beyond the machine’s established normal pattern, schedule an inspection before the next planned outage. Buying sensors without ownership, baseline data, and response rules can create dashboards without better reliability.
🧾 18. Keep Maintenance Records That Support Troubleshooting
Useful records connect symptoms, work performed, parts used, settings, and results. They allow a team to see patterns that memory misses, such as a bearing replaced repeatedly at the same position or a seal failure after every product changeover.
Capture enough detail to make the next decision easier. Record component identification, observed condition, likely cause if known, lubricant type, measurements, corrective action, and whether the repair restored normal operation.
A brief, accurate record is better than an elaborate form completed after the details are forgotten. Standardized failure codes can help analyze trends, but they should not prevent technicians from adding a clear practical note.
🔎 19. Investigate Repeat Failures Instead of Normalizing Them
A component that fails repeatedly is rarely just unlucky. Replacing it with an identical spare may restore operation, but it does not necessarily remove the stressor that caused the failure.
Use a structured root-cause approach. Define the failure precisely, gather evidence before disassembly destroys it, compare the condition with normal operation, and test plausible causes. Ask why each contributing condition existed, not only why the final component broke.
For example, a hypothetical conveyor bearing that fails every few months may be suffering from misaligned pulley shafts, water entering a damaged seal, an over-tensioned belt, or all three. The correct solution could involve alignment, sealing, and operating practice—not a more expensive bearing alone.
🧰 20. Install Replacement Parts With Clean, Controlled Methods
Many premature failures begin during installation. Dirt introduced into a bearing, a seal lip nicked by a sharp shaft edge, a coupling hub forced on incorrectly, or a component struck through its rolling elements can create damage before normal service begins.
Prepare the job: confirm part numbers, inspect fits and mating surfaces, clean the work area, use the correct tools, and protect exposed components. Apply force only to the ring or surface being fitted; never transmit installation force through rolling elements.
After assembly, verify rotation, clearances where applicable, fastener security, guarding, lubrication, and initial operating behavior. A short, controlled commissioning check is cheaper than discovering an installation issue after the machine has returned to full production.
📦 21. Store Spares So They Remain Reliable
A spare part is only valuable if it is usable when needed. Moisture, dust, vibration, poor identification, expired elastomers, and improper handling can degrade inventory long before installation.
Store bearings in their original packaging until use, keep lubricants sealed and labeled, protect shafts and machined surfaces from corrosion, and rotate stock when shelf-life limits apply. Heavy motors and gearboxes should be supported correctly to avoid distortion or damage during storage.
Critical spares also need technical control. Confirm compatibility after equipment modifications, maintain current part numbers, and identify substitutes only after engineering review. A near-match may fit physically while having the wrong material, clearance, seal, or electrical rating.
🔌 22. Include Electrical Problems in Mechanical Reliability Work
Mechanical wear and electrical condition are often connected. Motor imbalance, poor connections, improper drive settings, and voltage problems can cause overheating or torque variation that increases mechanical stress.
Stray shaft currents can damage some bearing systems by creating tiny electrical discharge marks on rolling surfaces. This risk depends on motor, drive, grounding, and bearing arrangement, so it should be assessed by qualified personnel rather than assumed from a bearing failure alone.
Coordinate electrical and mechanical inspections. Checking motor temperature, current behavior, grounding arrangements, coupling condition, and driven-load behavior together gives a more complete picture than treating the motor and machine as unrelated assets.
🦺 23. Make Safety Part of Every Reliability Task
Reliable work cannot be separated from safe work. Lockout and isolation procedures prevent unexpected energization, while stored-energy controls address pressure, gravity, springs, rotating inertia, and hot surfaces.
Guards, interlocks, and emergency stops should not be bypassed to save minutes during inspection or adjustment. A machine that runs smoothly with a missing guard is not a reliable machine; it is an uncontrolled risk.
Maintenance instructions should define safe access and verification steps, not only technical settings. If a task is difficult to perform safely, people may skip it or improvise. Improving access, lighting, drain points, and lubrication routing can improve both safety and maintenance quality.
💰 24. Balance Planned Work Against Unnecessary Replacement
Replacing parts too late risks secondary damage and downtime. Replacing them too early wastes usable life and can introduce installation errors. The best timing depends on failure consequence, condition evidence, and how predictable the wear mechanism is.
Some components have an age-related wear pattern and suit planned replacement. Others fail more randomly, making condition monitoring, functional testing, or redundancy more sensible than changing them strictly by calendar.
Cost decisions should include more than the purchase price of a part. Consider downtime, labor, product loss, safety exposure, lead time, and the risk that a failure damages connected equipment. This broader view helps justify targeted reliability improvements without replacing every part prematurely.
🧠 25. Avoid Common Habits That Accelerate Wear
Several familiar shortcuts create long-term problems. Ignoring a small leak, topping up oil without finding why the level fell, using an unknown grease because it is nearby, and tightening bolts until “they feel right” can all conceal the true condition of equipment.
- Running equipment after a new noise appears without documenting it.
- Mixing lubricants without checking compatibility.
- Using compressed air to blow dirt toward seals and bearings.
- Restarting after a jam without identifying the source of the jam.
- Changing settings without recording the original value.
These actions are understandable under production pressure, but they transfer risk to a later shift. A disciplined pause to inspect, document, and correct the cause usually protects more time than it consumes.
🔄 26. Turn Findings Into Continuous Improvement
Reliability improves when information returns to the people who design tasks, operate equipment, order parts, and plan shutdowns. A repair should produce learning: what failed, what was found, whether detection was early enough, and what should change.
Review recurring issues at a practical level. Perhaps a grease point needs remote access, a guard traps debris, a bearing housing needs better sealing, or operators need a clearer startup check. Small changes often remove the conditions that repeatedly create wear.
Continuous improvement does not require a large technology project. It requires a habit of closing the loop between observation, analysis, correction, and verification.
✅ The Core Principle: Control the Conditions That Create Wear
The eight central habits are straightforward: understand wear patterns, prioritize critical assets, use and control lubricants correctly, exclude contamination, maintain alignment and tension, monitor condition, prevent overload, and investigate repeat failures. Their strength comes from applying them as a connected system.
Wear usually accelerates when several small conditions combine: a slightly contaminated lubricant, a marginal seal, a misaligned drive, and an overloaded operating cycle. Addressing only one symptom may help temporarily, while addressing the conditions together changes the machine’s long-term reliability.
Start with the machines whose failure has the greatest consequence, establish a normal operating baseline, and make inspections specific enough to reveal change. That turns maintenance from emergency response into deliberate control of machine health.
Unexpected breakdowns become less likely when teams detect small deviations, correct their causes, and protect every machine’s basic operating conditions. That is the practical foundation of durable, dependable equipment. ⚙️🔧📈