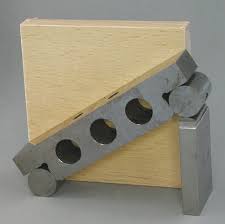
It is a precision measuring instrument and is an excellent example of combination of linear measurement and angular measurement when used in conjunction with gauge blocks (slipgauges). It consists of a bar carrying a suitable pair of rollers set a known centre distance. It is made of high carbon, high chromium corrosion resistant steel, suitably hardened, precision ground and stabilised. Relief holes are provided for easy handling of sine bar and for reducing the weight of the sine bar. It should be used on a grade A surface plate.

 Dial Gauge
 Workpiece l
h


 Slip Gauges h
Surface Plate
Fig. 2.24 Sine bar
If l is the linear distance between the axes of the rollers and h is the height of the slip gauges, then sin = h/l
The design requirements of a sine bar are as follows, and unless these are carefully maintained the order of accuracy of angular measurement will fall:
i) The rollers must be of equal diameter and true geometric cylinders.
ii) The distance between the roller axes must be precise and known, and these axes must be mutually parallel.
iii) The upper surface of the beam must be flat and parallel with the roller axes, and equidistant from each.
Working principle of Sine bar:
The sine bar is first kept on the surface plate. The work piece is then placed on the sine bar such that the surface whose taper angle is to be measured is facing upwards. Place the set of slip gauges under one end of the roller of sine bar such that the upper surface of the work piece is approximately parallel with the table surface. Place the plunger of t he dial gauge on the upper surface of the work piece. Take readings with the dial gauge at both ends and note their difference, noting which end of the work is low. Assuming that the end nearest the high endof the sine bar is low, then the slip gauges height must be increased by an amount equal to the difference in the dial gauge readings multiplied by the proportion of sine bar length to work length. For example, assuming that the end of a workpiece was 0.01mm low, the sine bar being
250 mm long and the work 100 mm long, then the required increase in height of slip gauge set will be 0.01 x 250/100 = 0.025 mm. This will not give an immediately correct setting from a first approximation, but it is much quicker than a trial and error method.
Note:
a) No sine bar should be used to set off angles greater than 45, as beyond this angle, the errors due to the centre distance of rollers, and slip gauges, being in error are much magnified.
b) Slip gauges should be kept beneath the setting roller attached to the end which is with taper shape but not beneath the hinge roller. This is to enable the slip gauges not to hit the bottom surface of sine bar.
c) If the work piece is of large size, then the sine bar is kept upside down on the surface of the work piece as shown below.
d)
Reading R2
Dial Test
Fiducial
Indicator
 Reading R1
 Component
Vernier
Height Gauge
Fig. 2.25 Use of Sine bar with large work piece
The height over the rollers can be measured by a vernier height gauge; using a dial test gauge mounted on the anvil of height gauge to ensure constant measuring pressure.
Sine Centre:
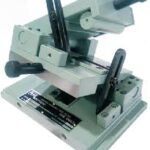
It is the Sine bar carrying centres to hold conical work piece. A typical Sine centre set up is shown in next page.

Although it must be pointed out that any work which runs out to a measurable extent would probably be considered as sub-standard in quality and be rejected on this account.


