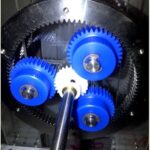
The spur gear is manufactured by the gear hobbing method. Often you design the gears and source it from the suppliers. What if the supplied gear is of different pressure angle than you required? Before going to the methodologies of how to measure the pressure angle of the gear, let’s see some of the important gear terminologies related to our discussion.
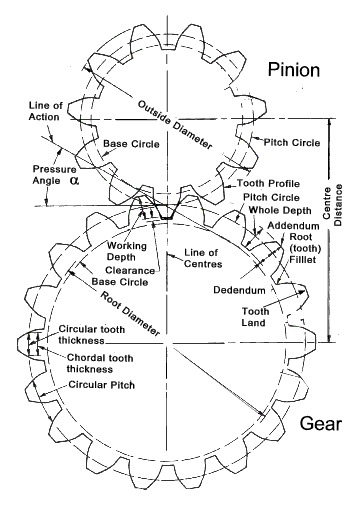
Related Gear Terminologies
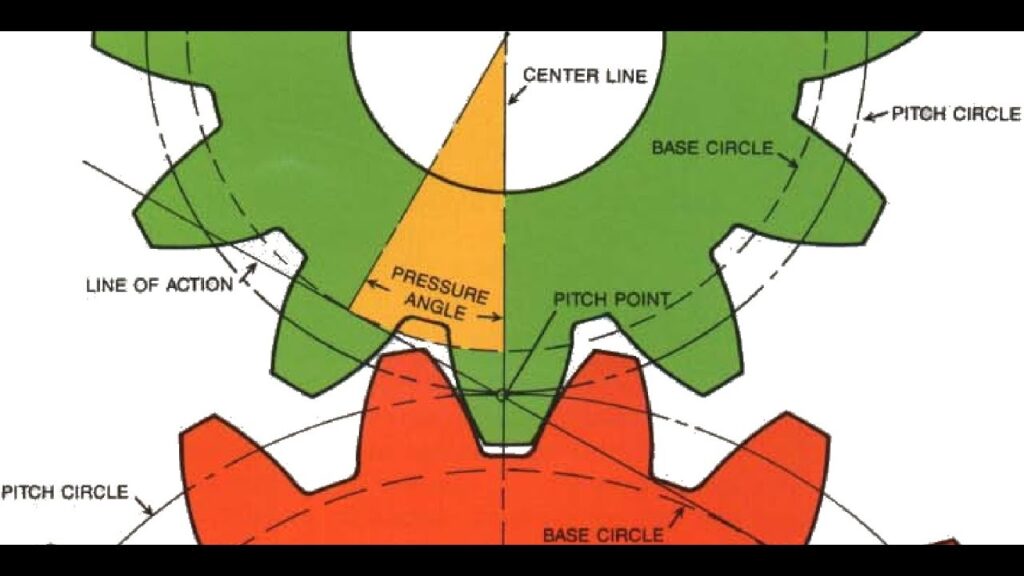
§ Pressure Angle (∞): If you can draw a common normal line to the meshing teeth surfaces at the contact point between the meshed teeth and a tangent plane common to the pitch circles of both the gear then angle between the common normal line and the tangent plane is called pressure angle.
§ Circular Pitch (P): Measure the distance between the corresponding points of the adjacent teeth on the pitch circle circumference for getting the circular pitch.
§ Diametrical Pitch (DP): The number of teeth available per unit pitch circle diameter is called diametrical pitch. It can be calculated from the following equation:
DP = Π/P =N/D………Eqn.2
Where,
P = Circular pitch
N = Number of teeth
D = Pitch circle diameter
Base Pitch (BP): If you measure the on the base circle circumference then the pitch value is called base pitch. The base pitch is related to the diametrical pitch by the following equation:
BP = [Π*Cos (∞)]/DP …..Eqn.3
Measuring Procedure
§ From the definition you must have noticed that it will be very difficult to measure the pressure angle directly from a physical gear. So we will discuss a method where the Eqn.3 and Eqn.2is used for indirectly measuring the parameter.
§ Measure Diametrical Pitch (DP): Take a good vernier and measure the outer diameter of the gear. Now measure the addendum and subtract the double addendum from the outer diameter and you will get the pitch circle diameter. Now calculate the ratio of the pitch circle diameter to the number of teeth to find out the diametrical pitch (DP) value.
§ Measure Base Pitch (BP): Use the vernier and place its jaws across the few teeth at lower portion of the pitch circle. You can take any number of teeth at a time but the vernier should be “best fitted” over there like below:
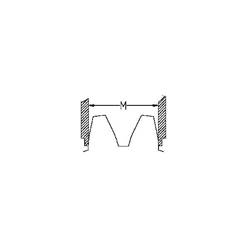
First take a reading for two teeth and then take a reading for three teeth. Subtract the two values and you will get the base pitch value for the gear. Repeat the process for some more number of teeth (like 5 teeth and 4 teeth etc.) and take the average value of all.
§ Now enter the diametrical pitch value and the base pitch values you already measured to the Eqn.3 and you will get the pressure angle for the gear.
Conclusion
Success of the procedure descried in the article for measuring the pressure angle of a gear depends on human skill so may vary from person to person, but since measuring the pressure angle directly from a physical gear is not that easy one can cross check the pressure angle by this method without using many instruments.
