This a sample UT procedure and you need to modify it to meet your project specification.
Scope
1.1-This procedure describes the general requirements for Ultrasonic examination of metallic welding according related approved weld maps as may be required by the specification or under .which component is being designed and manufactured.
1.2- This procedure provides the materials, equipment, personnel qualification, examination process, evaluation, record and acceptance standards for XXX project which will be fabricated in YYY Company
1.3-Ultrasonic testing / examination shall be performed in accordance with the procedure which shall as a minimum contain the requirement of table T-421 in ASME Section V.
References
2.1- ANSI, ASME Sec.VIII devision 1 & 2 Appendix 12
2.2- ANSI, ASME Sec.V article 4 & 5
2.3- ANSI recommended practices No.ASNT-TC-1A for NDT personnel qualification and certification
General:
3.1-Basic Requirements and Terms
When this procedure is specified by a referencing code section, the ultrasonic testing method described in this procedure shall be used with ASME code section V-article 1, 4 & 5 & ASME SEC.VIII, DIV.1. When SA, SB and SE documents are referenced, they are located in article 23.
3.2-Examination coverage (scan overlap)
Each pass of the search unit shall overlap minimum 10% of the transducer (piezo-electric element) dimension perpendicular to the direction of the scan.
3.3- Rate of search unit movements
The rate of search unit movement for examination shall not exceed 6 inch/sec(150 mm/s).
Personnel Qualification:
The N.D.T. personnel whose performing ultrasonic testing / examination shall be qualified and meets the requirements of level II, in Accordance to ASNT-SNT-TC-1A.
Surface Preparation
The surface to be subject to ultrasonic testing shall be free from any existing lubricants, dirt, residue, rust and sharp edges, so; to smoothly carry on the procedure.
Equipments
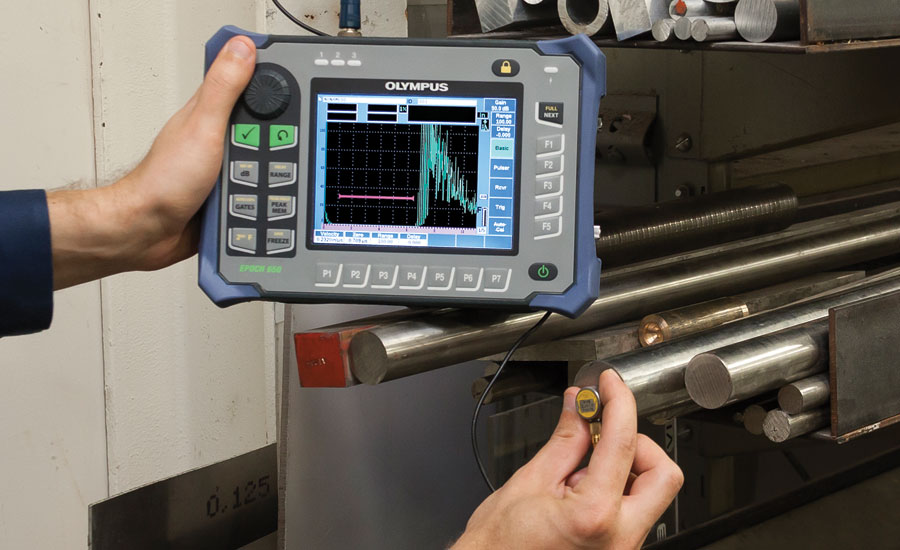
6.1- Examination shall be conducted with a pulse echo A-Scan ultrasonic testing instrument capable of generating frequencies over the range of at least 1 MHZ to 5 MHZ. Ultrasonic testing instrument shall be calibrated for the examination and shall be capable of meeting the requirements of screen height linearity and amplitude control linearity in paragraph 5.3 & 5.4 of this procedure.(Trade name of ultrasonic testing instrument is krautkramer USN-52) Ultrasonic testing instrument shall be equipped with stepped gain control in units of 2 dB or less (according to ASME sec V-T-431).
6.2- Search Units
Search units may contain either single or dual transducer element.The search unit size shall be selected according to the following table.
(1) Straight Beam. (either single or dual crystal)
| Frequency(MHz) | Transducer size(mm) | Material thickness(mm) |
| 4 or 5 | Ø10 | 25.4 or less |
| 2 or 4 | Ø10 or Ø20 | Over 25.4 |
(2) Angle Beam
| Search unit Angle | Frequency(MHz) | Transducer size(mm) | Material thickness(mm) |
| 70º | 4 | Ø10 | 12.5 or less |
| 60º , 70º | 4 | Ø10 | 12.5 or 25.4 |
| 45º , 60º or 45º , 70º | 4 | Ø10 | Over 25.4 |
(3) Search units with contoured contact wedges may be used to aid ultrasonic coupling.
6.3-Screen Height Linearity
The ultrasonic testing instrument shall provide linear vertical presentation within ±5% (According to ASME Sec.V, Article 5 T-532) of the full screen height for 20% to 80% of the calibrated screen height.
The procedure for evaluating screen height linearity is provided in appendix 1 of article 5, ASME code Sec.V and shall be performed at the beginning of each period of extended use (or every 3 months, which ever is less).
6.4-Amplitude Control linearity
The ultrasonic testing instrument shall utilize an amplitude control accurate over its useful range to ± 20% of the nominal amplitude ratio, to allow measurement of indications beyond the linear range of the vertical display on the screen, the procedure for evaluating amplitude control linearity is given in appendix 2 of article 5, ASME code Sec.V and Shall be performed at the beginning of each period of extended use (or every 6 months, whichever is less).
6.5- Couplant
SAE No.20 or No 30 motor oil, glycerin and adhesive wall paper shall be used. Couplants may not be comparable to one another, and the same couplant shall be used for calibration and examination. couplant used on nickel base alloy shall not contain more than 250 ppm of sulfur and those used on austenitic stainless steel shall not contain more than 250 ppm of halides (chlorides plus flourides).
6.6-Angel & Mode of Wave Propagation in the Material
For angel beam probe , the mode of wave propagation in material is shear wave and the related applicable angel & size & frequency is described in table 6.2.2.
For normal beam probe, the mode of wave propagation in material is longitudinal wave and the related applicable angel & size & frequency is described in table 6.2.1.
Calibration:
7.1- Basic Calibration Blocks
7.1.1- The basic calibration reflectors shall be used to establish a primary reference response of the equipment.The basic calibration reflectors may be located either in the component material or in a basic calibration block. Where the most used blocks in this regards are block V1 & V2. (approved calibration). Also basic calibration blocks shall be utilized to construct a distance amplitude correction curve (DAC). Basic calibration reflectors shall be according to ASME, Sec.V, T434.2.1 (for non piping calibration block) and T-434.3(for piping calibration block).And certificates for U.T. equipment, test block V1 & V2 probes etc. shall be submitted to the purchaser.
7.1.2- Block Selection
Basic calibration blocks shall be of similar metallurgical structure and the same material specification or an equivalent P-number grouping as the finished component for the purpose of this, P-numbers 1,3,4 & 5 materials are considered equivalent.The finish on the surfaces of the block shall be representative of the scanning surface finishes on the components to the examined.
7.2- System Calibration
7.2.1- Angle Beam Calibrations
As applicable the calibration shall provide the following measurements (refer to article 4, appendix B, ASME code Sec.
(1) Distance Range Calibration
(2) Distance-Amplitude Correction
(3) Position Calibration
(4) Echo Amplitude Measurement from the Surface Notch in the Basic Calibration Block.
When an electronic distance amplitude correction device is used, the primary reference responses from the basic calibration block shall be equalized at a screen height between 40 to 80% of full screen height over the distance range to be employed in the examination.
7.2.2- Straight Beam Calibration
The calibration shall provide the following measurements(Refer to article 5, ASME code Sec. V ).
(1) Distance Range Calibration
(2) Distance-Amplitude Correction
When an electronic distance-amplitude correction device is used, the primary reference response from the basic calibration block shall be equalized on the basic calibration block at a screen height between 40% and 80% of full screen height over the distance range to be employed in the examination.
7.3- Calibration Confirmation
Calibration shall be performed prior to use of the system in the thickness range under examination. A calibration check shall verify the sweep range calibration and distance-amplitude correction.
7.3.1- Distance Range Points
If a point on the DAC curve has moved on the sweep line more than 10% of the sweep reading or 5% of full sweep, which ever is greater, correct the distance range calibration and note the correction in the examination record. If reflectors are recorded on the data sheets, those data sheets shall be voided and a new calibration shall be recorded.
All recorded indications since the last valid calibration or calibration check shall be Re-examined with the corrected calibration and their values shall be changed on the data sheets.
7.3.2- DAC correction If a point on the distance-amplitude correction (DAC) curve has decreased 20% or 2 db of its amplitude, all data sheets since the last calibration or calibration check shall be marked void. A new calibration shall be made and recorded and the area covered by the voided data shall be Re-examined. If any point of the distance-amplitude correction (DAC) curve has increased more than 20% or 2 db of its amplitude, all recorded indications since the last valid calibration or calibration check shall be Re-examined with the corrected calibration and their values shall be changed on the data sheets.
Examination
8.1- General Requirements:
The scanning shall be performed at a gain setting at least two times the primary reference level evaluation shall be performed with respect to the primary reference level.
The volumes shall be scanned by straight and angle beam techniques as a described in detail in paragraph 8 angle beams, having nominal angles as recommended in table 6.2.1 & 6.2.2 with respect to a perpendicular to the examination surface, shall generally be used.Other pairs of angle beams are permitted provided the measured difference between the angle is at least 10º.
8.1.1- Angle beam method scanning shall be made basically from outside of the vessel by the direct contact method. The angle beam shall be directed at approximately right angle to the weld axis from two direction where possible to detect the reflectors oriented angular to the weld .In addition, the angle beam shall be directed essentially parallel to the weld axis to detect the reflectors oriented transverse to the weld. The search unit shall be manipulated so that the ultrasonic energy passes through the whole volumes of weld and heat affected zone (20mm) of base metal.The refraction angle of the angle beam transducer & exit point shall be measured using IIW standard calibration block. The tolerance of the refraction angle shall not be more than ±2º
8.1.2- Straight Beam Method
(1) The heat affected zone and weld where practicable shall be scanned with the straight beam search unit, before scanning with angle beam.
(2) The scanning of the adjacent base metal of at least 2t tana (where t=base metal thickness & a=1/2 groove angle) shall be performed to detect reflectors that affect interpretation of angle beam results, and is not to be used as an acceptance rejection examination. Locations and areas of such reflectors shall be recorded.
8.2- Surface Preparation
The base metal on each side of the weld shall be free of weld spatter, surface irregularities, or foreign matter that might interfere with the examination.
8.3- Scanning Sensitivity
The scanning shall be performed at a gain setting at least two times the primary reference level and evaluation shall be performed with respect to the primary reference level.
8.4- Detection of Defects Parallel to the Weld
The angle beam shall be directed at approximately right angle to the weld axix from two directions where possible.
The search unit shall be manipulated so that the ultrasonic beam passes through the required volumes of weld and adjacent base metal.
8.5- Detection of Traverse Defects
The angle beam shall be directed angular to the weld axis. The search unit shall be manipulated so that the ultrasonic beam passes through the all of the volume be examined.
8.6-Method of Sizing Indications
For normal & angel beam ultrasonic testing inspection , method of sizing indication is half value method measurement (6 dB drop) as follow:
The size of reflectors which are large is comparison to the sound beam diameter can be determines by edge scanning probe is moved from a position witch provides the optimum flaw echo to the edge of the flaw.the point at which the echo height is half the optimum value,i.e.where the beam axis is incident on the edge of the flow,is marked on the testing surface.a series of such point outline the reflector surface.
The half value length (HVL) is the distance measured on the test object between edge point in a longitudinal direction,the half value width (HVW) in a normal direction.
The 6 dB technique involves obtaining an echo from a position where the reflector extends across the full width of ultrasonic beam and then moving the beam along the reflector until the echo has fallen by half (i.e by 6 dB).it is then assumed that only one half of the beam is impinging on the reflector whose edge,therefore,lies along the beam axis.the technique is applicable to both normal & angel probes,and is most frequently used for the potting of lamination in plate ,and for measuring the length of linear imperfection in welds.
8.7-Direction & Extend of Scanning
Direction of scanning in ultrasonic testing inspection of weld line angle beam probe shall be perpendicular to weld line axis & extended of related scanning shall be cover the full skip area & 100 % of weld line .for detection of defects parallel to the weld line axis shall meet the requirement 8.4.for detection of transfer defects to the weld line axis shall meet the requirement 8.5.
8.8-Method for discriminating geometric from flow indication
● Linear indication such as cracks (transfer & longitudinal), lack of penetration,lack of fusion and slag line produce single very sharp and height flow indication that when search unit swing around the defect’s location cause immediate drop of related echo in ultrasonic testing display device.
● Rounded indication such as isolated porosity & slag produce single low gain flow indication that when search unit swing around the defect’s location ,related echo in ultrasonic testing display device not eliminate immediately.
● Rounded indication such as cluster porosity produce multi-flow indication like a grass & noise.
● Location(depth & distance) of all above indication shall be investigate & interpretate by estimation of maximum sound path of related indication .
● False and Non relevant indication shall be separate by relevant indication with interpretation of the depth , location , height of related echo , ….by expert ultrasonic testing operator.
8.9-Weld configuration to be examined(including thickness dimension & base material product form)
The applicable thickness dimension for ultrasonic testing inspection in this project is above 10 mm.
Base material product form for this project if plate & pipe form.
8.10-Scaning method
The scaning method for this procedure is manual with A-scan method
Evaluation:
Any imperfection which causes an indication in excess of 20% DAC shall be investigated to the extent that it can be evaluated in terms of the acceptance standards of the referencing code section (refer to T 480 ASME code Sec V Article 4).
Acceptance standard
10.1-ASME Section VIII division I, Appendix 12
All imperfections that produce an amplitude greater than 20% of the reference level shall be investigated to the extent that the operator can determine the shape, identity and location of all such imperfections and evaluate them in terms of the following acceptance standards.
10.1.1- Imperfections that are interpreted to be cracks, lack of fusion or incomplete penetration are unacceptable regardless of length.
10.1.2- All other linear type imperfections are unacceptable, if the amplitude exceeds the reference level and the length of the imperfection exceeds the following:
(1) ¼ in. for T up to ¾ in.
(2) 1/3 T for T from ¾in. to 2 ¼ in.
(3) ¾ in. for T over 2 ¼ in.
Where T is the thickness of the weld excluding any allowable reinforcement.
For a butt weld joining two members having different thicknesses at the weld, T is the thinnest of these two thickness.
If a full penetration weld includes a fillet weld, the thickness of the throat of the fillet shall be included in T.
Reports:
A report of the examinations shall be made. The report shall include a record indicating the welds or volume examined (this maybe marked-up sketched) the location of each recorded reflector, and the identification of the operator whom carries out each examination or part there of as detailed in T-493, ASME Sec.V article 4.
A record of all reflections from uncorrected areas having responses that exceed 50% of the reference level shall be maintained. This record shall locate each area, the response level, the dimension, the depth below the surface, and the classification.


