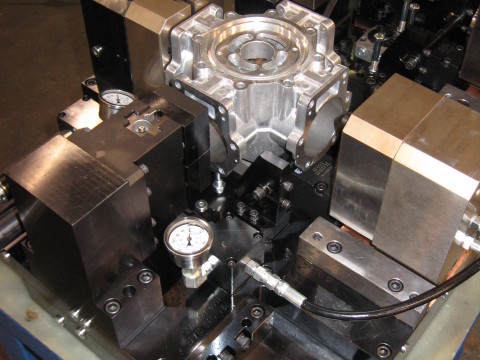
This article gives step by step guidelines for a designer on how to systematically go about designing a work holding fixture with hydraulic clamping. Practical advice on what sort of inputs to be collected and how to use common sense in deciding the various design aspects are explained.
Start With the Preliminary Steps Before Making the Design Drawings
The first and foremost thing that a machine designer does before accepting a design task is to determine whether the job requirements are within his knowledge, experience, and capability to design. In case he has doubts and reservations, does he have seniors and higher-ups to guide him in areas where he may encounter knowledge limitations? Does he have access to the necessary technical literature, theoretical support, reference material or drawings, and designs of similar equipment made in the past which he can study and grasp?
Only when the answer is a clear “yes” should the designer proceed to undertake the task, and not otherwise. Now the designer can go through the following steps to progress in his design work:
A) Collect all relevant input information:
Let us take for an example a design task where the designer has to develop a work holding fixture with a hydraulically operated clamping device on a milling machine.
He must have the following essential inputs:
1) The drawing of the component to be milled – its condition before being presented to the machine and as it comes out of the machine, containing all relevant dimensions, tolerances, surface finish requirements, etc.
2) The “as presented to machine” drawing should contain areas to be used for location, resting, orientation, and clamping. If GD&T approach is applied in defining required dimensions and tolerances of the component, features defined as datum will be very good guide for determining these areas. In case the customer is not sure of these details, the designer may have to choose or suggest such areas and get his customer’s concurrence. In case any pre-machining is deemed to be done (other than what the customer had intended), it has to be discussed and agreed.
3) Details of the tool used for cutting, the cutting speed and feed rates to be used, and the expected output per hour are be specified by the customer. Where the customer wants recommendations from the designer on all these aspects, it is necessary that the designer works out these details, calculates the possible output per hour that can be expected, and informs these parameters in writing to the customer and gets approval.
4) The specifications of the machine in which the fixture has to be used must be obtained. The specifications should include capacity details of the machine used (table size, T-slot dimensions on table, machine spindle power, spindle nose details, traversing distances (x,y,z axis travels) machine capacity/interference diagram showing details of daylight, distance of table edge from column, etc, available speed and feed rates on the machine, and so on.
5) In case of milling operations like side and face cutting, slitting or slab milling, whether the operation is to be up-milling or down-milling is to be decided. It is extremely important to remember that down-milling is not at all advisable on hydraulically operated machines. Even in machines with screw feeds, down-milling is not advisable if the machine is quite old and if there is no provision available for backlash elimination in the screw rod nut. It is necessary to communicate to the customer any decision contrary to customers’ expectations on this issue.
B) Do rough estimation of cutting forces:
Some rough estimates of tangential cutting force and feed force etc will be useful in deciding the clamping force required. A designer should have a good common sense in observing the direction of cutting forces too so as to decide the right type of location, butting and clamping of the component. Take note of the following guidelines:
○ Always aim at having a fixed, rigid part of the fixture element to take up the cutting forces.
○ To the extent possible, avoid using hydraulic clamping against the direction of cutting force.
○ Where the component has a tendency to lift up, try to device a suitable butting element to arrest the lifting of the component as far as possible.
C) Decide on the best way of doing the hydraulic clamping:
When the component is to be hydraulically clamped, the designer should think of various alternatives of clamping, taking into consideration the ease of loading and unloading. A swing clamp will be very advantageous to use from ease of loading point-of-view. Sometimes, a direct clamping using a hydraulic cylinder may be good enough. In some cases, a suitable lever mechanism actuated by a hydraulic cylinder may work out to be the best way.
Whatever be the method, the designer should calculate the estimated clamping force based on cylinder bore size and hydraulic pressure, taking into account the effect of any leverage used in the clamping mechanism. A clamping force, 2 to 3 times the estimated cutting forces may be chosen. The designer should also take into account any possibility of bucking or bending of the component due to clamping force and try to avoid such a scenario.
Once the designer has zeroed on the type of hydraulic clamping, it will be prudent to check with the customer about the make of the cylinder/standard hydraulic swing clamp chosen. Some customers may have preference for certain makes, for the sake of standardization.
Now the designer is ready to start drawing the layout. If the CAD drawing of the component can be obtained from the customer, to that extent, one can save time in redrawing the component’s profile. Likewise, the designer should try to get the CAD drawing of the hydraulic cylinder/clamping device from its suppliers’ database or from the designer’s standard parts library, if already available.


