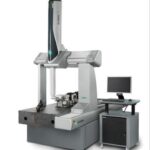
Often inexperienced coordinate measuring machine (CMM) operators will perform dimensional measurements without correctly establishing a part alignment. Manual and computer numerical control (CNC) CMM operators sometimes try to use the CMM as a 2-D or 1-D height gage.
In choosing a CMM for a measurement application, determination of the error budget often focuses on items such as vibration and temperature, but the effects of poor measurement techniques are often forgotten. Knowing the CMM software is not enough; a CMM programmer or operator must have good metrology skills, understand basic geometry and, at a minimum, know how to read a blueprint and geometric dimensioning and tolerancing. Without having the right know-how tools, CMMs, as any other gage, will be used incorrectly or inaccurately.
Incorrectly defining or failing to define a part alignment is the single most influential factor in gage repeatability errors and incorrect measurements. Consider that a perfectly round 1-inch diameter hole on a flat plate would show nearly 0.002 inch of form (roundness) error if measured as a circle and the part were 5 degrees skewed from being parallel to the current CMM axis. Never assume that because a part sits on a CMM surface it can be measured without alignment.
A part alignment accomplishes two main objectives: First, defining the part function-usually depicted on the print via datum-and secondly, establishing the coordinate system or frame of reference for physically measuring the part.
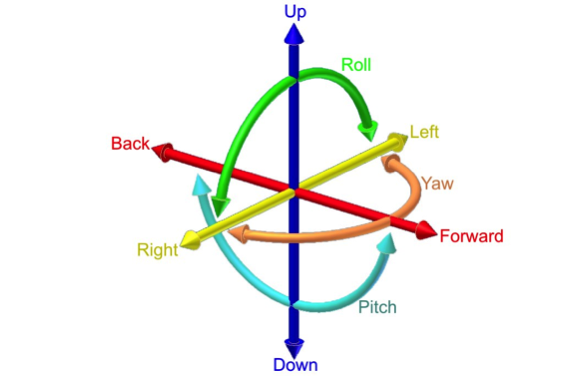
To define a part alignment, the operator must constraint, or lock, all three axes of the coordinate system to the part. This is done via the CMM software and requires establishing the direction of X, Y and Z, as well as their intersection point-origin or XYZ zero point. There are three basics steps to building a part alignment:
Step 1: Level or Spatial Alignment
This must always be done before measuring any other feature. It helps to separate feature types by their 3-D (spatial) vs. 2-D (planar) nature.
Use:
Planes: Define the direction perpendicular to it-for example, the top plane on a part.
Cylinders and cones: Define the direction parallel to its main axis.
3-D lines: Define the direction three-dimensionally parallel to it-for example, the axis of a shaft.
Do not level to a line unless it is constructed to be truly 3-D.
Don’t Use:
Circles, 2-D lines, points or spheres. Remember this principle: Circles and 2-D lines are dependent on a reference or work plane. Therefore, these are bad choices for level.
As a word of caution, remember that lines and cylinders get their vector direction from the order in which they are measured or constructed-for example, the first to last point for lines.
Step 2: Rotation or Planar Alignment
This always follows the level step. One of the remaining two axes after the level step is rotated so as to make it two-dimensionally parallel to a selected feature.
Use:
Plane: Define the select axis to be perpendicular to the plane-two directions. For example, one of the square sides of a block.
Cylinder and cone: Define the selected axis to be parallel (2-D) to its axis.
2-D line and 3-D line: Define the selected axis to be parallel to its 2-D projection.
Step 3: Origin or Axis Translations
This must always be performed after level and rotation. It may be done in one step- for example, zero all axis to a sphere, but it may take several steps. For example, Z=0 at top of a part, X=Y=0 at a hole location.
The quality of any CMM inspection program is only as good as the thought process put into building a sound and robust part alignment.
Part Alignment Sample
The crankshaft was set up nearly parallel to the CMM Y-axis. In this example, one piston arm-mounting journal is the reference.
Level (Spatial Alignment) Steps:
1. Front and end bearing journals are measured as circles, temporarily using the CMM workplane (ZX) or a measured end plane on the part.
2. Construct a 3-D axis line between the circles.
3. Level the CMM axis to this 3-D line (for example, +Y).
Rotation (Planar Alignment) Steps:
1. Measure the top journal as a circle. This time because we are leveled, the current ZX plane can be used.
2. Construct a line from the 3-D axis line to the circle.
3. Rotate +Z about +Y so that it is parallel (in the ZX plane) to the constructed line above.
Origin (Translations) Steps:
1. Set X=0 to the 3-D axis line that the +Y is leveled to.
2. Set Z=0 to the 3-D axis line that the +Y is leveled to.
To set Y=0 a feature that locks the translation is needed. In this example, measure a plane on one of the shaft steps and create an intersect point between the 3-D axis line and the plane. Set Y=0 at this point.


