Knoop Hardness Test
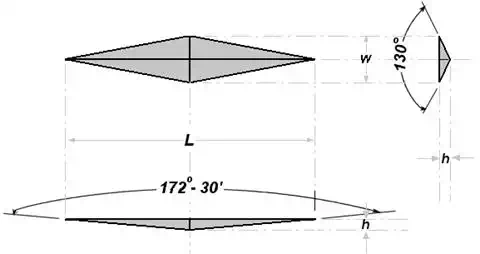
The term microhardness test usually refers to static indentations made with loads not exceeding 1 kgf. The indenter is either the Vickers diamond pyramid or the Knoop elongated diamond pyramid. The procedure for testing is very similar to that of the standard Vickers hardness test, except that it is done on a microscopic scale with higher precision instruments. The surface being tested generally requires a metallographic finish; the smaller the load used, the higher the surface finish required. Precision microscopes are used to measure the indentations; these usually have a magnification of around X500 and measure to an accuracy of +0.5 micrometres. Also with the same observer differences of +0.2 micrometres can usually be resolved. It should, however, be added that considerable care and experience are necessary to obtain this accuracy.

The Knoop hardness number KHN is the ratio of the load applied to the indenter, P (kgf) to the unrecovered projected area A (mm2)
KHN = F/A = P/CL2
Where:
F = applied load in kgf
A = the unrecovered projected area of the indentation in mm2
L = measured length of long diagonal of indentation in mm
C = 0.07028 = Constant of indenter relating projected area of the indentation to the square of the length of the long diagonal.

