Introduction:
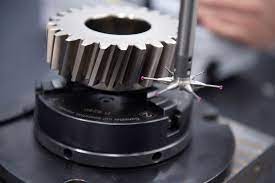
Gears are mechanical drives.
Gears are used to transmit power. Gear in the form of a toothed wheel.
Types of gears:
Spur gear
Helical gear
Spiral gear
Bevel gear
Worm and Worm wheel
Rack and pinion
Gear terminology:
Tooth Profile
Base circle
Pitch circle diameter
Pitch
Addendum
Dedendum
Pressure angle ()
Circular pitch
Clearance(C)
Blank diameter
Face, Flank, Top land
Back lash
Module (m)
Pitch point
Tooth thickness.
Gear errors:
Adjacent pitch error
Cumulative pitch error
Profile error
Cyclic error
Periodic error
Run out
Radial run out
Axial run out
Gear measurement (Spur gear):
Concentricity
Alignment
Hardness
Pith:
1. Point to point measurement
2. Direct angular measurement
Run out
Lead
Backlash
Profile:
1. Optical projection method
2. Involute measuring machine
3. Tooth displacement method.
Tooth thickness:
1. Constant chord method
2. Base tangent method


