Eddy current inspection is used in a variety of industries to find defects and make measurements. One of the primary uses of eddy current testing is for defect detection when the nature of the defect is well understood. In general, the technique is used to inspect a relatively small area and the probe design and test parameters must be established with a good understanding of the flaw that is to be detected. Since eddy currents tend to concentrate at the surface of a material, they can only be used to detect surface and near surface defects.
In thin materials such as tubing and sheet stock, eddy currents can be used to measure the thickness of the material. This makes eddy current a useful tool for detecting corrosion damage and other damage that causes a thinning of the material. The technique is used to make corrosion thinning measurements on aircraft skins and in the walls of tubing used in assemblies such as heat exchangers. Eddy current testing is also used to measure the thickness of paints and other coatings.
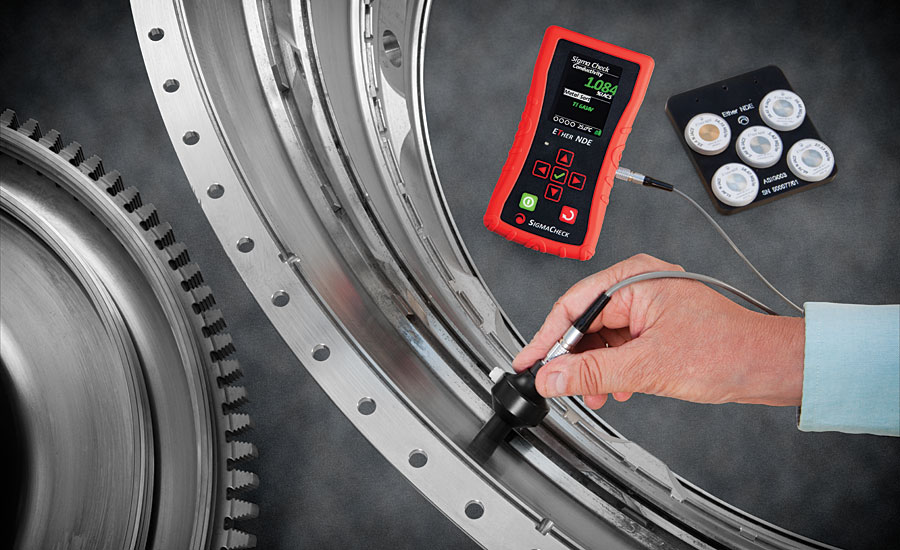
Eddy currents are also affected by the electrical conductivity and magnetic permeability of materials. Therefore, eddy current measurements can be used to sort materials and to tell if a material has seen high temperatures or been heat treated, which changes the conductivity of some materials.
Eddy current equipment and probes can be purchased in a wide variety of configurations. Eddyscopes and a conductivity tester come packaged in very small and battery operated units for easy portability. Computer based systems are also available that provide easy data manipulation features for the laboratory. Signal processing software has also been developed for trend removal, background subtraction, and noise reduction. Impedance analyzers are also sometimes used to allow improved quantitative eddy-current measurements. Some laboratories have multidimensional scanning capabilities that are used to produce images of the scan regions. A few portable scanning systems also exist for special applications, such as scanning regions of aircraft fuselages.
Research to Improve Eddy current measurements
A great deal of research continues to be done to improve eddy current measurement techniques. A few of the these activities, which are being conducted at Iowa State University, are described below.
Photo inductive Imaging (PI)
A technique known as photo inductive imaging (PI) was pioneered at CNDE and provides a powerful, high-resolution scanning and imaging tool. Microscopic resolution is available using standard-sized eddy-current sensors. Development of probes and instrumentation for photo inductive (PI) imaging is based on the use of a medium-power (5 W nominal power) argon ion laser. This probe provides high resolution images and has been used to study cracks, welds, and diffusion bonds in metallic specimens. The PI technique is being studied as a way to image local stress variations in steel.
Pulsed Eddy Current
Research is currently being conducted on the use of a technique called pulsed eddy current (PEC) testing. This technique can be used for the detection and quantification of corrosion and cracking in multi-layer aluminum aircraft structures. Pulsed eddy-current signals consist of a spectrum of frequencies meaning that, because of the skin effect, each pulse signal contains information from a range of depths within a given test specimen. In addition, the pulse signals are very low-frequency rich which provides excellent depth penetration. Unlike multi-frequency approaches, the pulse-signals lend themselves to convenient analysis. .
Measurements have been carried out both in the laboratory and in the field. Corrosion trials have demonstrated how material loss can be detected and quantified in multi-layer aluminum structures. More recently, studies carried out on three and four layer structures show the ability to locate cracks emerging from fasteners. Pulsed eddy-current measurements have also been applied to ferromagnetic materials. Recent work has been involved with measuring the case depth in hardened steel samples.


