Introduction
Have you ever wanted to create a machine that sorts objects automatically? Whether it’s sorting coins, candies, marbles, or recyclables, a mechanical sorting system is a fun and educational DIY project! It involves a mix of mechanical design, electronics, and basic coding, making it an excellent project for hobbyists, students, and makers. 🚀
In this guide, we’ll explore how to build a simple mechanical sorting system using basic materials and affordable components like motors, sensors, and Arduino. Let’s get started! 🎉
1. Understanding Mechanical Sorting Systems 🛠️
A mechanical sorting system is a device that categorizes objects based on their size, weight, material, or color. These systems are used in recycling plants, vending machines, and even in the food industry.
Here’s how different sorting mechanisms work:
- Gravity-Based Sorting – Objects fall through different-sized holes.
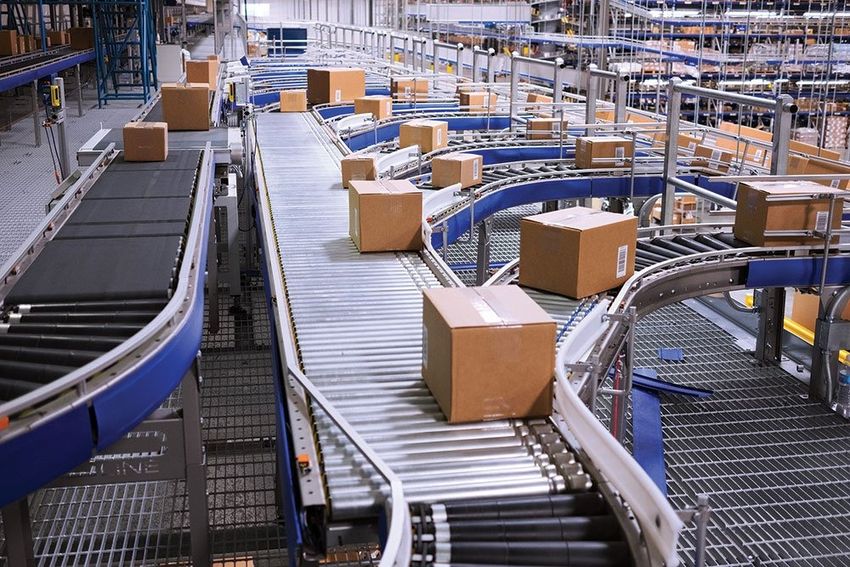
- Conveyor Belt Sorting – A moving belt carries objects past sensors that direct them to different bins.
- Magnetic Sorting – Separates ferrous (iron-based) materials from non-magnetic ones.
- Color Detection Sorting – Uses sensors to identify colors and sort accordingly.
For our DIY project, we’ll build a simple system that sorts objects based on size and weight using mechanical gates and sensors.
2. Materials Needed 🏗️
Basic Mechanical Components:
✅ Wooden or plastic board (for base)
✅ Small DC motors or servo motors (for gates)
✅ Hinges and levers (for movement)
✅ Screws, nuts, and bolts (for assembly)
Electronic Components:
✅ Arduino Uno (or any microcontroller)
✅ Ultrasonic Sensor (for object size detection)
✅ Weight Sensor (Load Cell + HX711 module)
✅ IR Sensor or Color Sensor (optional for advanced sorting)
✅ Relay Module (for motor control)
✅ 12V Power Supply or Battery Pack
Tools Required:
🔹 Soldering iron & wires
🔹 Screwdriver & drill
🔹 Glue gun
🔹 3D printer (optional for custom parts)
3. Building the Mechanical Framework ⚙️
Step 1: Design the Sorting Path
1️⃣ Use a slanted surface or conveyor belt to move objects towards the sorting section.
2️⃣ Objects should roll down naturally or be pushed by the belt.
3️⃣ Create a sorting mechanism with dividers that separate objects into bins.
Step 2: Install the Sorting Gates
🔹 Hinged flaps or servo-operated gates will control the path of objects.
🔹 Attach servo motors to control the flaps based on the object’s properties.
🔹 Use guiding rails to direct objects into the correct bin.
Step 3: Mount Sensors for Detection
📍 Ultrasonic sensor: Measures the object’s size as it moves through the system.
📍 Load cell: Detects weight to differentiate objects of similar size.
📍 IR sensor: Detects object presence and triggers sorting logic.
4. Wiring and Electronics Setup 🔌
Connecting the Sensors to Arduino
Here’s a simple wiring guide for connecting the sensors to the Arduino Uno:
Ultrasonic Sensor (HC-SR04)
PinConnection to ArduinoVCC5VGNDGNDTrigDigital Pin 7EchoDigital Pin 6Load Cell with HX711
HX711 PinArduino ConnectionVCC5VGNDGNDDTDigital Pin 3SCKDigital Pin 2Servo Motors
Servo WireArduino ConnectionRed5VBlackGNDYellowDigital Pin 9 (PWM)5. Coding the Sorting Logic 💻
Below is a basic Arduino code to detect object size and move the sorting gate accordingly:
cpp
--------------
#include <Servo.h>

// Define sensors and motors
#define TRIG_PIN 7
#define ECHO_PIN 6
#define SERVO_PIN 9
Servo sortingGate;

void setup() {
  Serial.begin(9600);
  pinMode(TRIG_PIN, OUTPUT);
  pinMode(ECHO_PIN, INPUT);
  sortingGate.attach(SERVO_PIN);
  sortingGate.write(90);  // Default position
}

void loop() {
  // Measure object size
  long duration;
  digitalWrite(TRIG_PIN, LOW);
  delayMicroseconds(2);
  digitalWrite(TRIG_PIN, HIGH);
  delayMicroseconds(10);
  digitalWrite(TRIG_PIN, LOW);
  duration = pulseIn(ECHO_PIN, HIGH);
  float distance = duration * 0.034 / 2;

  Serial.print("Object Size: ");
  Serial.println(distance);

  // Sorting Logic
  if (distance < 5) {
    sortingGate.write(45);  // Move to small object bin
    delay(1000);
  } else {
    sortingGate.write(135); // Move to large object bin
    delay(1000);
  }
  sortingGate.write(90);  // Reset position
}
💡 How it works:
- The ultrasonic sensor measures the size of an object.
- The Arduino moves the servo-controlled sorting gate based on object size.
- You can expand this logic by integrating a weight sensor for additional sorting.
6. Testing & Fine-Tuning 🔄
1️⃣ Test individual components (sensors, motors) separately.
2️⃣ Adjust sensor sensitivity for better accuracy.
3️⃣ Optimize sorting speed by changing delay times.
4️⃣ Improve mechanical stability with better mounting.
7. Expanding the Project 🚀
Want to make your sorting system even cooler? Try these upgrades:
🔹 Color Sorting: Use an RGB sensor to categorize objects by color.
🔹 AI Integration: Train a machine learning model to classify objects via a camera.
🔹 Smartphone Control: Use an ESP32 to control the sorter via a mobile app.
🔹 Recycling Machine: Sort plastics, metals, and glass for home recycling.
Final Thoughts 🎯
Building a mechanical sorting system is a fantastic DIY project that blends mechanics, electronics, and programming. Whether you’re sorting marbles, nuts & bolts, or recyclables, this project helps develop problem-solving skills while being fun and rewarding!